
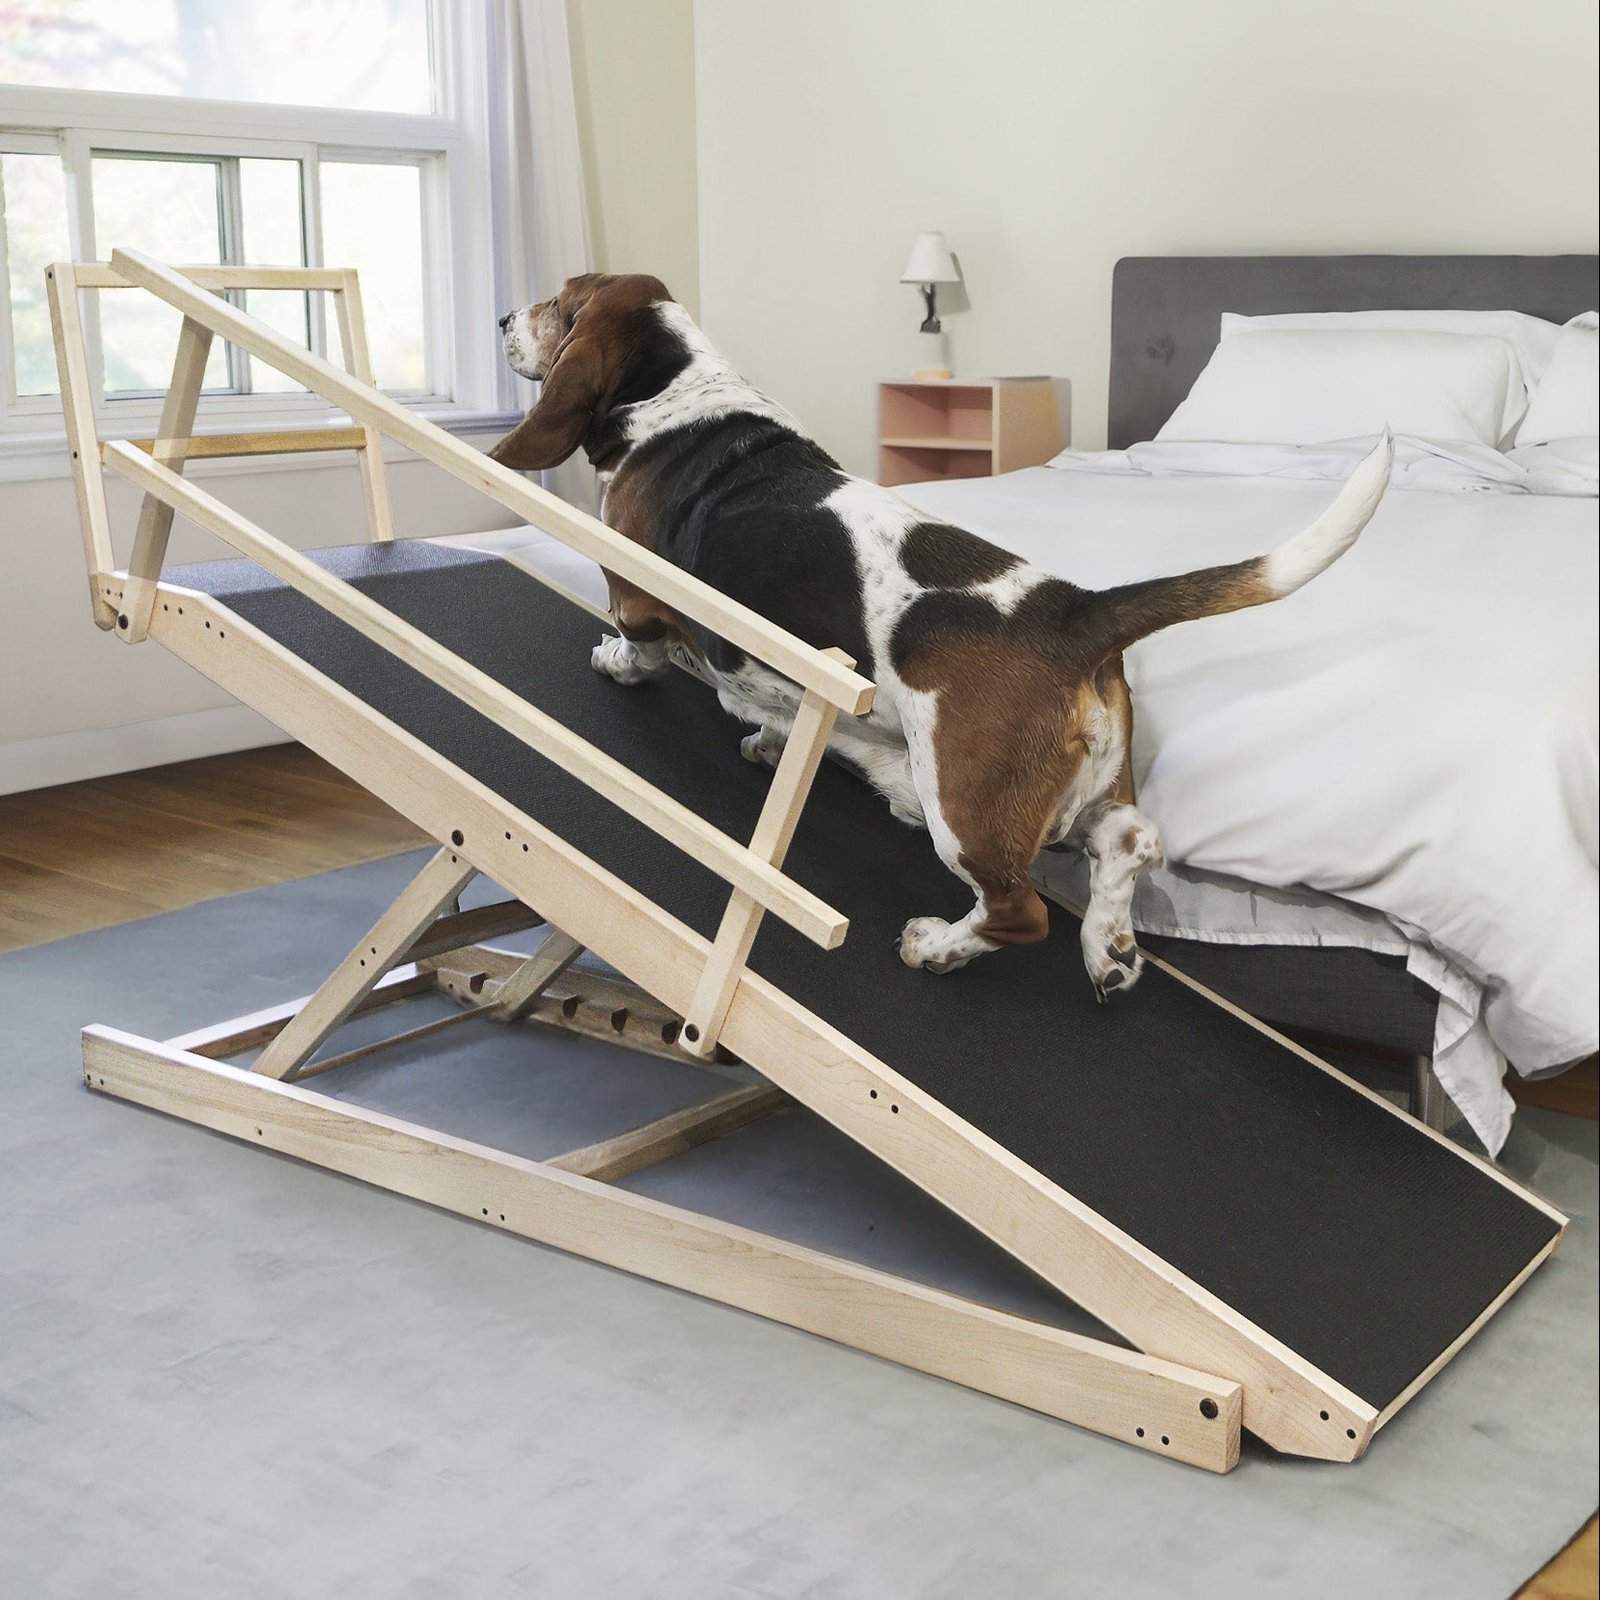
Are you tired of seeing your beloved dog struggle to jump onto your bed? Watching your furry friend face such a challenge can tug at your heartstrings.
You want to offer them comfort and freedom, but buying a commercial dog ramp might be too pricey or not the perfect fit for your bedroom. What if you could solve this problem by making a custom ramp yourself? Imagine the peace of mind you'll have knowing your pet can safely and easily join you on the bed anytime.
In this guide, you'll discover a simple and cost-effective way to build a dog ramp that suits your pet's needs and your room's style. Keep reading to learn how to make a dog ramp for your bed that will enhance your pet's comfort and well-being.

Credit: www.reddit.com
Choosing The Right Materials
Choosing the right materials sets the foundation for a sturdy and safe dog ramp. The materials you pick influence the ramp’s durability, comfort, and how easy it will be for your dog to use. Think about your dog’s size, weight, and the ramp’s location to help guide your choices.
Selecting Wood Types
Wood is a popular choice because it’s strong and easy to work with. Plywood offers a smooth surface but may need extra grip added to prevent slipping. Pine is affordable and lightweight but less durable for bigger dogs.
Hardwoods like oak or maple are tougher and last longer but can be heavier and more expensive. You want wood that won’t splinter or warp over time. Have you considered how weather or indoor humidity might affect your wood choice?
Gathering Tools And Supplies
Having the right tools makes building your ramp faster and safer. Basic supplies include a saw, drill, screws, and sandpaper. Don’t forget a measuring tape and a pencil to mark your cuts precisely.
You’ll also need materials for traction, such as non-slip tape or outdoor carpet. These help your dog climb without slipping. If you want to finish the ramp, pick pet-safe paint or sealant to protect the wood.
Safety Considerations
Safety should be your top priority. Make sure all edges are smooth to avoid splinters. Sand every surface thoroughly, especially where your dog’s paws will touch.
Check that screws and nails are flush or countersunk so nothing pokes out. Traction is crucial—without it, even the best ramp can be dangerous. How will you test the ramp’s stability before your dog uses it?

Credit: www.vevor.com
Measuring And Planning The Ramp
Measuring and planning are vital before building a dog ramp for the bed. Accurate measurements ensure the ramp fits perfectly and is safe for your dog. Proper planning helps avoid mistakes and saves time during construction.
Start by understanding your dog's needs and the bed's dimensions. This will guide you in deciding the ramp's height, length, and angle. Careful planning also improves comfort and usability.
Determining Ramp Height And Length
Measure the height from the floor to the bed's top edge. Use a tape measure for accuracy. This height is the ramp's vertical rise.
Next, decide how long the ramp should be. A longer ramp means a gentler slope. Consider your dog's size and mobility when choosing length.
Calculating The Slope Angle
The slope angle affects how easy the ramp is to climb. A gentle angle prevents strain on your dog’s joints.
Use this formula to find the angle:
- Angle = arctangent (height ÷ length)
A slope between 18 and 25 degrees is ideal for most dogs. Steeper slopes may cause difficulty or injury.
Sketching The Design
Create a simple drawing of your ramp based on your measurements. Include the height, length, and width of the ramp.
Label parts like the ramp surface, supports, and side rails. This helps visualize the build and guides construction.
Sketching also allows you to spot problems before you start. Adjust dimensions to improve safety and stability.
Cutting And Preparing The Pieces
Cutting and preparing the pieces is a crucial part of making a dog ramp for your bed. This stage sets the foundation for a sturdy and safe ramp that your dog can use with confidence. Paying attention to precise measurements and smooth finishes will make a big difference in the final product’s quality and your pet’s comfort.
Cutting The Ramp Surface
Start with a durable piece of plywood or solid wood for the ramp surface. Measure the length and width carefully based on your bed height and your dog’s size. Use a circular saw or handsaw to cut the wood evenly, ensuring the edges are straight and the size fits perfectly in your space.
Have you considered how wide the ramp should be? It should be wide enough for your dog to walk comfortably, typically around 18 to 24 inches. Cutting too narrow can make your dog hesitant to use the ramp, so take your time with accurate measurements.
Preparing Side Supports
The side supports add stability and help keep the ramp secure. Cut two long pieces to match the length of your ramp surface. These pieces will act like rails, preventing the ramp from wobbling or tipping over.
Think about the thickness of the wood for these supports. Using something sturdy, like 1x4 or 1x6 lumber, can provide the strength needed without adding too much weight. Attach these supports securely once cut, making sure they line up well with the ramp surface.
Sanding For Smooth Edges
After cutting, rough edges and splinters can pose risks to your dog’s paws. Sand all surfaces thoroughly using medium-grit sandpaper first, then finish with fine-grit for a smooth touch. This step not only improves safety but also gives the ramp a polished look.
Don’t rush through sanding. I once skipped this step and noticed my dog was hesitant to use the ramp because of uncomfortable rough patches. Smooth edges build your dog’s trust and encourage regular use. Have you checked every corner and edge for splinters?

Credit: www.priorpet.com
Assembling The Ramp
Assembling the dog ramp brings all parts together for a safe and sturdy structure. Each piece must fit well to support your dog’s weight. Careful assembly ensures the ramp stays strong and secure.
Attaching Side Supports
Side supports keep the ramp stable and prevent it from wobbling. Use wooden planks or metal strips cut to the ramp’s length. Attach them firmly to each side using screws or nails.
Make sure the supports are straight and aligned. Check that all screws are tight to avoid any loose parts. The side supports create a strong frame for the ramp surface.
Securing The Ramp Surface
The ramp surface is where your dog walks up and down. Choose a sturdy board that can hold your dog’s weight without bending. Attach the surface to the side supports using screws spaced evenly.
Ensure the surface is smooth but not slippery. Add non-slip tape or paint with textured paint to help your dog grip better. Secure edges carefully to avoid sharp corners or splinters.
Adding Stability Features
Extra stability makes the ramp safe to use. Add rubber feet or pads at the bottom of the ramp legs to prevent slipping on floors. Consider cross braces between the side supports for added strength.
Check the ramp on the bed and floor for any movement. Tighten all screws again if needed. Stability features keep the ramp steady and comfortable for your dog’s climb.
Adding Traction And Finishing Touches
Adding traction and finishing touches to your dog ramp is essential for safety and durability. Without proper grip, your dog might slip and lose confidence using the ramp. Plus, a well-finished ramp looks great and lasts longer, making the effort truly worthwhile.
Applying Non-slip Covering
Start by choosing a non-slip surface that suits your dog’s paws. Options include adhesive grip tape, rubber mats, or textured paint specifically made for traction. Apply the covering evenly, focusing on the areas your dog’s feet will contact the most.
Remember, smooth surfaces can be dangerous. I once saw a dog hesitate to use a ramp because it was too slippery. Adding a textured layer gave her the confidence to climb with ease. Could your dog be feeling the same hesitation right now?
Painting Or Staining Options
After securing traction, protect the wood with paint or stain. Use pet-safe, non-toxic products to ensure your dog’s safety. Painting not only seals the wood but also adds a splash of color that can match your room decor.
Consider a semi-gloss finish—it’s easier to clean and resists dirt. Stains highlight the wood grain, giving a natural look while still protecting the ramp. Which finish would best fit your home’s style and your dog’s needs?
Testing The Ramp For Safety
Before letting your dog use the ramp, test it yourself. Apply weight gradually and check for any wobble or weak spots. Make sure the ramp stays firmly in place and doesn’t slide on the floor.
Watch how the ramp feels underfoot. Is the traction solid? Is it comfortable to walk on? Invite your dog to try it slowly, encouraging and praising them. Safety is not just about structure—it’s about your dog feeling secure every step of the way.
Maintaining And Adjusting The Ramp
Maintaining and adjusting your dog's ramp keeps it safe and comfortable. Regular care helps extend the ramp's life and ensures your dog uses it easily. Small changes over time can make a big difference for your pet’s comfort.
Routine Cleaning Tips
Clean the ramp often to remove dirt and hair. Use a damp cloth or mild soap with water. Avoid harsh chemicals that can harm your dog’s paws. Dry the ramp well to prevent slipping. Keep the surface clean for good traction.
Inspecting For Wear And Tear
Check the ramp regularly for cracks or loose parts. Look at the joints, screws, and surface material. Replace or tighten anything that looks weak. A damaged ramp can cause accidents. Keep it sturdy to support your dog’s weight safely.
Making Adjustments For Growth
Adjust the ramp height as your dog grows or changes weight. Raise or lower the ramp to match the bed height. Add extra padding if needed for comfort. Ensure the ramp angle stays gentle to avoid strain. A well-fitted ramp helps your dog climb with ease.
Frequently Asked Questions
What Materials Do I Need To Build A Dog Ramp For Bed?
You need plywood, non-slip surface material, screws, wood glue, and sandpaper. Optional tools include a saw and drill. These materials ensure safety and durability for your dog's ramp.
How Do I Determine The Right Ramp Size For My Dog?
Measure your dog’s length and height from floor to bed. The ramp should be long enough to create a gentle slope, ideally a 18-25 degree incline, to prevent strain during use.
Can I Make A Foldable Dog Ramp For Easy Storage?
Yes, using hinges and lightweight materials allows the ramp to fold. This design saves space and makes storage and transport convenient without sacrificing stability.
How Do I Ensure The Dog Ramp Is Safe To Use?
Add a non-slip surface like grip tape or carpet. Secure all parts tightly and sand edges smooth. Proper slope and sturdy construction prevent accidents and injuries.
Conclusion
Building a dog ramp for your bed helps your pet climb safely. It keeps joints healthy and prevents injuries. You only need a few tools and materials to start. Follow simple steps and measure carefully for the best fit. Your dog will love the easy access to your bed.
This small project can improve your pet’s comfort every day. Give your dog a safe way to join you. A homemade ramp is practical and affordable too. Try making one today and see the difference.