
If you’ve ever wanted to invite beautiful hummingbirds to your garden, knowing how to open a hummingbird feeder the right way is the first step. It might seem simple, but a small mistake can lead to sticky messes or even harm the birds you want to attract.
In this guide, you’ll learn easy, clear steps to open and refill your feeder quickly and safely. By the end, you’ll feel confident and ready to enjoy these tiny, colorful visitors up close. Keep reading—you’re just moments away from turning your backyard into a hummingbird haven!

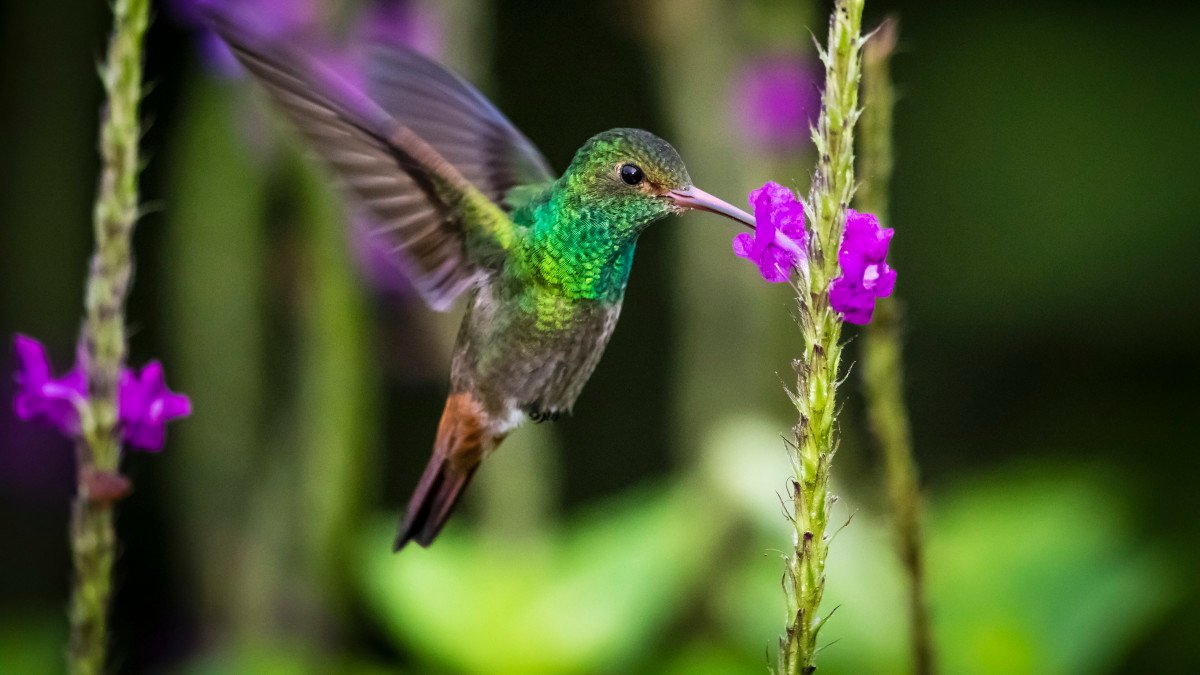
Credit: m.youtube.com
Choosing The Right Feeder
Choosing the right hummingbird feeder is key to attracting these tiny visitors and making your feeding experience enjoyable. The perfect feeder not only suits your space but also meets the needs of hummingbirds effectively. Let’s look at what you should consider before making your pick.
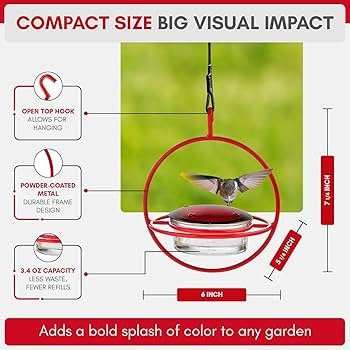
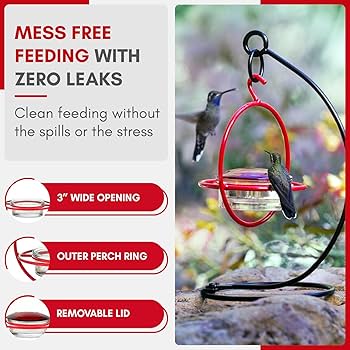
Types Of Hummingbird Feeders
Hummingbird feeders come in various styles, each with unique features. Some have multiple feeding ports, which allow more birds to feed at once, while others have built-in ant moats to keep pests away.
Consider a feeder with bright red parts to catch the birds’ attention. Tube feeders are classic and easy to clean, while saucer or dish feeders offer a different feeding experience. Which type do you think would attract more birds in your garden?
Materials And Durability
Feeders are made from plastic, glass, or metal. Glass feeders are often easier to clean and don’t hold odors, but they can break easily. Plastic feeders are lightweight and less fragile, but some may absorb colors or smells over time.
Metal feeders tend to last longer and resist squirrels better but might be pricier. Think about your climate and how often you want to replace your feeder when choosing the material. Would you prefer something lightweight or something built to last?
Size And Capacity
The size of your feeder affects how often you need to refill it. Larger feeders hold more nectar, which is helpful if you have many hummingbirds visiting. However, nectar can spoil quickly, especially in hot weather.
Smaller feeders may need more frequent refills but reduce waste and keep the nectar fresh. How much time can you dedicate to maintaining your feeder? Your answer will help you decide the right capacity.
Preparing Your Feeder
Preparing your hummingbird feeder properly is key to attracting these tiny visitors and keeping them healthy. A clean, well-assembled feeder filled with fresh nectar makes all the difference. Let’s dive into how you can get your feeder ready for its first visitors.
Cleaning Before Use
Before you even think about filling your feeder, clean it thoroughly. Old nectar or dirt can spoil the fresh nectar quickly and harm hummingbirds.
Use warm water and a mild dish soap. Avoid harsh chemicals that might leave harmful residues.
Rinse every part well until no soap remains. A clean feeder means safer, happier birds.
Assembling The Parts
Next, put your feeder back together carefully. Check each piece for cracks or damage that might cause leaks.
Make sure the feeding ports and base fit tightly. Loose parts can spill nectar and attract unwanted insects.
If you have a feeder with multiple parts, follow the instructions but trust your eyes—everything should snap or screw together firmly.
Filling With Nectar
When it’s time to fill, use a simple nectar recipe: four parts water to one part white granulated sugar. No need for fancy ingredients or red dye.
Boil the water first to dissolve the sugar completely and kill any bacteria. Let it cool before pouring it into the feeder.
Fill the feeder just enough to avoid waste, and keep some nectar in the fridge for quick refills. How often do you think your local hummingbirds visit? Keeping nectar fresh will keep them coming back.
Opening Different Feeder Designs
Hummingbird feeders come in many designs, each with a unique way to open. Knowing how to open your feeder helps you fill it quickly and clean it easily. This section explains common feeder types and their opening methods. Simple steps make the process smooth and safe for the birds.
Twist-off Lids
Many feeders have lids that twist off. Hold the base firmly. Turn the lid counterclockwise until it loosens. Lift the lid carefully to avoid spilling nectar. Check for seals or rubber rings that keep the feeder tight. Replace the lid by twisting it clockwise until secure.
Snap-on Tops
Snap-on tops use clips or tabs to hold the lid. Press the tabs gently to release the lid. Lift the lid straight up to open. Be careful not to force it, which may break the clips. To close, align the lid and press down until it snaps in place.
Slide And Lock Mechanisms
Some feeders use slide and lock designs for added security. Look for arrows or indicators showing the sliding direction. Slide the lid or base in the indicated direction. Once unlocked, lift the part to open. To close, slide it back until it clicks or locks firmly.

Credit: www.yahoo.com
Tips For Easy Access
Opening a hummingbird feeder can sometimes be tricky. Some lids fit very tightly or have small parts that make access difficult. Simple tips help make the process smooth and stress-free. Easy access keeps your feeder clean and full, attracting more hummingbirds to your garden.
Using Tools For Stubborn Lids
Use a rubber grip or jar opener for better grip on tight lids. Sometimes, a pair of pliers with soft covers helps gently twist stubborn caps. Avoid using excessive force to prevent breaking the feeder. Tapping the lid lightly on a hard surface can loosen stuck parts. Warm water can soften seals and make lids easier to open.
Maintaining Feeder Parts
Regular cleaning prevents buildup that makes opening hard. Remove residue from threads and seals with a soft brush. Check seals and gaskets for wear and replace them if needed. Store feeders in a dry place to avoid rust or mold. Lubricate plastic threads with a little vegetable oil for smooth turning.
Avoiding Common Mistakes
- Don’t force the lid; this may cause cracks.
- Avoid using metal tools that can scratch or damage parts.
- Never leave feeders empty for long; dried sugar makes opening tough.
- Don’t twist the feeder body; always twist the lid only.
- Keep feeder parts organized to avoid losing small pieces.
Refilling And Cleaning Routine
Keeping your hummingbird feeder clean and full is key to attracting these tiny birds. A good routine for refilling and cleaning ensures the nectar stays fresh and safe. It also helps prevent mold and harmful bacteria from growing. This routine protects hummingbirds and keeps them visiting your feeder often.
Frequency Of Refills
Refill the feeder every 2 to 3 days in warm weather. Nectar spoils faster when it is hot. In cooler weather, refilling once a week is enough. Watch for signs of fermentation or cloudiness. Change nectar immediately if it looks bad. Fresh nectar attracts more hummingbirds and keeps them healthy.
Safe Cleaning Methods
Clean the feeder with warm water and a mild soap. Avoid using strong chemicals or bleach. Use a small brush to scrub all parts, including feeding ports. Rinse thoroughly to remove soap residue. Dry the feeder completely before refilling. Clean the feeder every time you refill to stop mold growth.
Storing Feeders When Not In Use
Empty the feeder if you do not plan to use it for a week or more. Wash and dry it well before storing. Store the feeder in a cool, dry place. Avoid leaving nectar inside during storage to prevent mold. Proper storage keeps the feeder in good condition for the next season.
Credit: www.amazon.ca
Frequently Asked Questions
How Do You Safely Open A Hummingbird Feeder?
To open a hummingbird feeder safely, hold the base firmly. Twist the top counterclockwise gently. Avoid spilling nectar and keep the feeder upright during the process to prevent mess and attract more hummingbirds.
What Tools Are Needed To Open A Hummingbird Feeder?
Most hummingbird feeders require no tools. Simply twist the feeder’s lid or base by hand. If stuck, use a rubber grip for extra traction. Avoid sharp tools that can damage the feeder or harm the birds.
How Often Should You Open And Clean The Feeder?
Open and clean your hummingbird feeder every 3 to 5 days. This prevents mold and bacteria buildup. Regular cleaning ensures healthy nectar and keeps hummingbirds safe and happy.
Can You Open The Feeder Without Disturbing Hummingbirds?
Yes, gently open the feeder when hummingbirds are not feeding. Approach slowly and quietly to avoid startling them. This helps maintain a peaceful environment for the birds.
Conclusion
Opening a hummingbird feeder is simple and rewarding. Follow the steps outlined, and you're ready. Just ensure regular cleaning to keep the feeder safe. This attracts more hummingbirds to your garden. Enjoy watching these beautiful creatures every day. It's a delightful experience for bird lovers.
Plus, it's a way to support nature. Remember, patience is key. Soon, your garden will be buzzing with activity. Keep observing and learning more about these tiny visitors. A hummingbird feeder brings joy and liveliness to your outdoor space. So, get started and enjoy the view!