

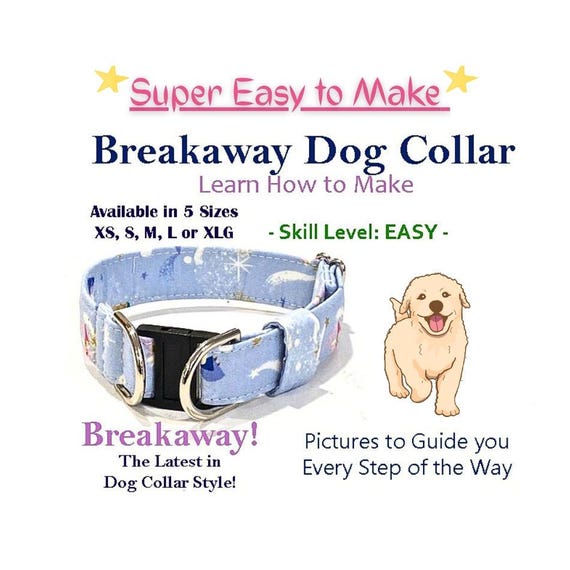
Have you ever found yourself wanting to make a unique dog collar, but the thought of sewing sends you running in the opposite direction? You're not alone.
Many dog owners like you want to create something special for their furry friends without the hassle of threading a needle. The good news? You can make a stylish and durable dog collar without sewing a single stitch! Intrigued? You should be.
This guide is about to reveal a simple yet effective method that will have your dog wagging its tail in no time. Keep reading to uncover the secret to crafting a personalized dog collar that’s not only easy to make but also adds a touch of flair to your pet’s wardrobe.
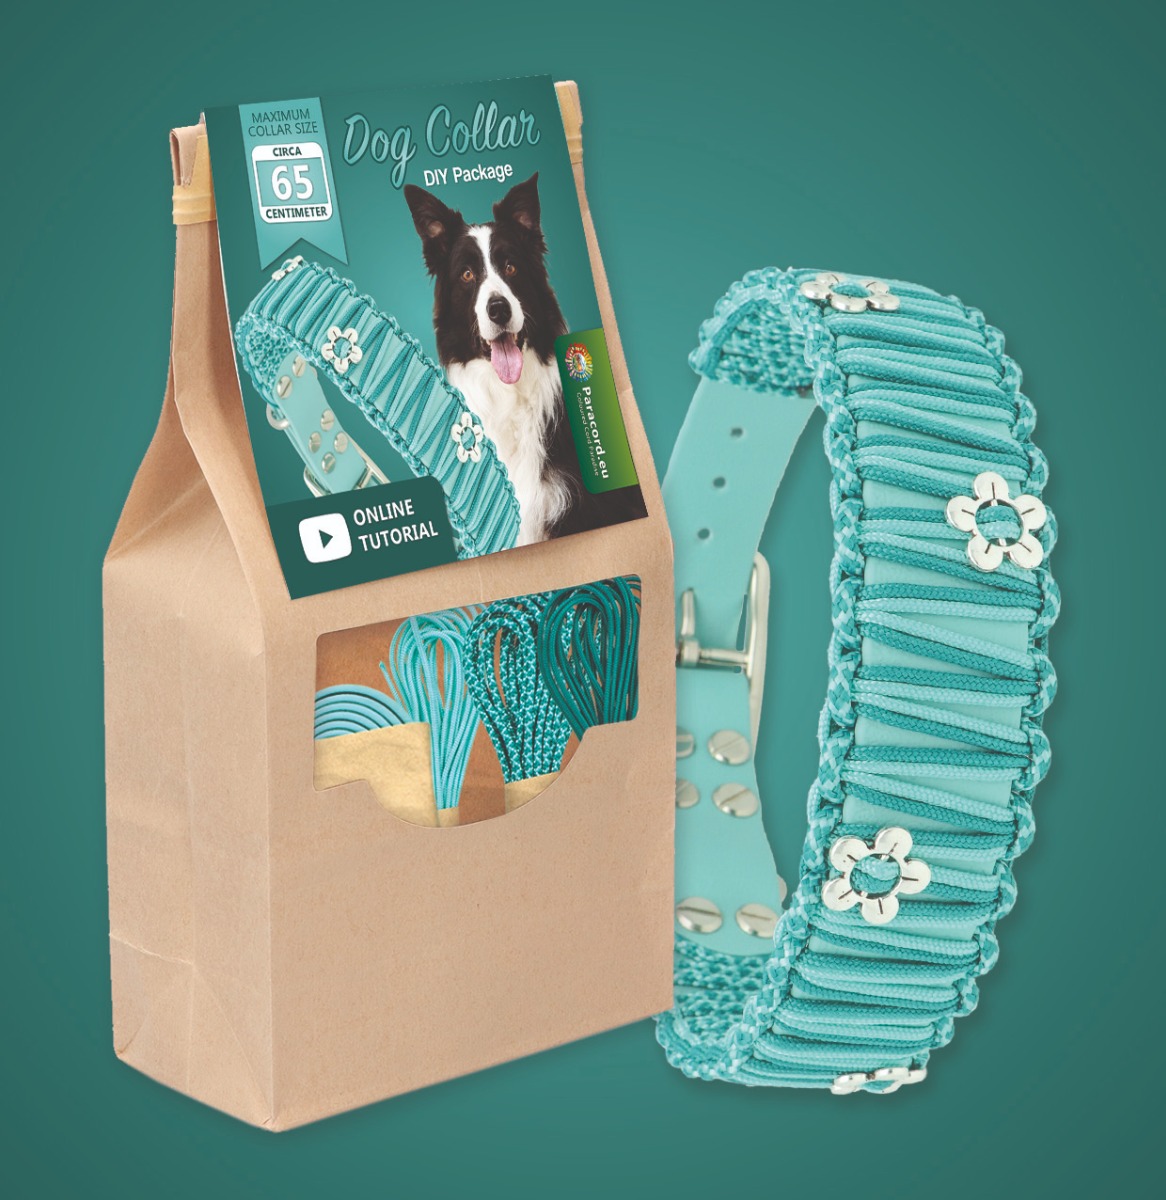
Credit: www.paracord.eu
Materials Needed
Gathering the right materials is key to making a dog collar without sewing. A well-chosen fabric and proper tools ensure the collar is strong and comfortable. Some decorative items can add a personal touch and make the collar unique. Prepare all materials before starting to make the process smooth and enjoyable.
Choosing The Right Fabric
Select a fabric that is soft but durable. Avoid rough materials that might hurt your dog’s skin. Cotton, nylon, or polyester webbing works well. These fabrics are easy to cut and hold up over time. Pick a fabric with a pattern or color you like. Make sure it is wide enough for your dog’s neck size. Strong fabric keeps the collar safe and secure.
Essential Tools
- Scissors – to cut fabric and webbing cleanly
- Measuring tape – to get the right collar length
- Fabric glue or strong adhesive – to hold pieces together
- Velcro strips or snap fasteners – to close the collar
- Ruler – to measure widths and align edges
- Marker or chalk – to mark cutting lines
Optional Decorative Items
- Ribbon or lace – adds style and texture
- Buttons or beads – for extra decoration
- Iron-on patches or stickers – easy to apply
- Fabric paint or markers – customize with names or designs
- Small bells – for sound and fun

Credit: tarareed.com
Measuring Your Dog
Measuring your dog accurately is the first crucial step to making a comfortable and safe collar without sewing. If the collar is too tight, it can irritate or harm your dog. Too loose, and your pet might slip out of it during walks.
Finding The Correct Collar Length
To find the right collar length, use a flexible measuring tape or a piece of string. Wrap it gently around your dog’s neck where the collar will sit—usually just below the ears. Make sure you can fit two fingers comfortably between the tape and your dog’s neck to avoid a collar that’s too tight.
If you don’t have a measuring tape, try using a strip of paper or ribbon, then measure it against a ruler. This simple trick helped me get the perfect fit for my energetic beagle, who hates anything feeling tight around his neck. Have you ever noticed your dog scratching or rubbing their collar? That’s a sign to double-check the length.
Determining The Width
The collar’s width affects comfort and durability. For small dogs, a width of about ¾ inch works well, while medium to large dogs benefit from collars between 1 to 1 ½ inches wide. Thicker collars provide more support but may feel bulky on smaller breeds.
Think about your dog’s activity level too. If your dog pulls a lot on walks, a wider collar can help distribute pressure more evenly. Have you observed your dog’s behavior on walks? This insight can guide your width choice and prevent discomfort.
Cutting The Fabric
Cutting the fabric is a crucial step in making a dog collar without sewing. This part sets the foundation for a neat, well-fitted collar that your dog will love. If the fabric isn’t cut accurately, the collar might look uneven or feel uncomfortable.
Marking The Fabric
Start by choosing the right fabric and laying it flat on a clean surface. Use a ruler or measuring tape to measure the length and width according to your dog’s neck size. Don’t forget to add a little extra length for overlap and fastening.
Mark the fabric clearly with a fabric marker or chalk. Make sure the markings are visible but easy to remove or hide later. This helps keep your cuts straight and precise, avoiding wasted material.
Tips For Accurate Cutting
- Use sharp scissors:Dull scissors can cause jagged edges and frayed fabric, which affects the collar’s durability.
- Cut slowly and steadily:Rushing increases the chance of mistakes. Take your time to follow the marks carefully.
- Secure the fabric:Pin the fabric to prevent it from shifting while cutting. This keeps your measurements accurate and consistent.
- Double-check measurements:Before cutting, compare the marked fabric with your dog’s neck size again. It’s better to be safe than sorry!
Have you ever cut fabric only to realize it was slightly off? That small mistake taught me to always mark twice and cut once. Your collar will not only look better but last longer with precise cutting.
Assembling The Collar
Assembling a dog collar without sewing can be surprisingly simple and fun. The key is to use the right adhesives and tapes that hold the materials firmly while keeping the collar comfortable and durable. Let’s explore some effective ways to put your collar pieces together without a needle and thread.
Using Fabric Glue
Fabric glue is a strong adhesive designed to bond cloth materials permanently. It works great for attaching layers of fabric or securing decorative elements on your collar.
Apply a thin line of glue along the edge of the fabric strip. Press the edges firmly together and hold for a few minutes until they stick. To make sure it lasts, let the glue dry completely—usually a few hours or overnight.
One tip I learned is to test the glue on a scrap piece first. This helps you avoid sticky messes or weak spots later on. Have you tried fabric glue before? It might surprise you how sturdy it feels once dry.
Applying Double-sided Tape
Double-sided tape can be a quick fix for assembling collars, especially if you want an instant hold without waiting for glue to dry. It’s perfect for lightweight fabrics or adding temporary layers.
Cut strips of tape slightly shorter than your fabric edges. Stick the tape on one side, peel off the backing, then press the pieces together firmly. The bond won’t be as strong as glue but works well for short-term use or prototypes.
Keep in mind, double-sided tape may lose stickiness over time, especially if your dog is active. Would you prefer a fast assembly or a longer-lasting collar? Your choice depends on how you plan to use it.
Securing With Heat Bond Tape
Heat bond tape is a no-sew adhesive that activates with an iron. It creates a durable, flexible bond ideal for dog collars that need to withstand some wear and tear.
Place the heat bond tape between the fabric layers. Use a hot iron (without steam) to press down firmly for about 10-15 seconds. The heat melts the adhesive, bonding the fabrics together instantly.
Make sure to follow the tape’s instructions carefully and protect your fabric with a thin cloth while ironing. I found this method combines strength and neatness better than other options. How much effort do you want to put into the assembly? Heat bond tape balances ease and durability well.
Adding Hardware
Adding hardware to your no-sew dog collar transforms simple materials into a functional and stylish accessory. This step is crucial because the hardware holds everything together and ensures your dog’s safety. Choose quality pieces like buckles and D-rings that fit your collar’s width and material for the best results.
Attaching Buckles
Start by selecting a buckle that matches your collar’s width and material strength. Plastic side-release buckles are lightweight and easy to attach without sewing. You can slide the collar material through the buckle’s slots and secure it by folding the ends or using strong adhesive tape designed for fabric.
If you prefer metal buckles, use rivets or snap fasteners made for no-sew projects. These can be pressed onto the collar material with pliers, holding the buckle firmly in place. Have you tried pressing rivets yourself? It’s surprisingly simple and creates a durable bond.
Adding D-rings
D-rings allow you to attach a leash or ID tags. Slide the D-ring onto the collar before securing the buckle end. Position it where you want the leash to connect, usually near the buckle for balance and comfort.
To attach the D-ring without sewing, you can use strong glue or rivet it in place. If you’re using glue, press the D-ring firmly and let it dry fully before testing the collar on your dog. Have a small piece of sturdy fabric or leather to wrap around the collar and D-ring for added strength.
Ensuring A Secure Fit
Once all hardware is attached, check the collar’s fit on your dog. It should be snug but not tight—allow two fingers to slide between the collar and your dog’s neck. This ensures comfort and prevents slipping off during walks.
Test the hardware by pulling gently on the buckle and D-ring. If any part feels loose, reinforce it with extra glue, tape, or rivets. Would you rather fix a loose collar at home or face a lost dog during a walk?
Decorating The Collar
Decorating a dog collar without sewing brings fun and style to your pet’s look. It lets you create a unique collar that shows your dog's personality. Simple decorations can turn a plain collar into something special. Use materials that are safe and soft for your dog’s comfort. Let your creativity flow while keeping the collar practical and durable.
Using Ribbons And Bows
Ribbons add color and charm to any dog collar. Choose ribbons with bright or soft colors to match your dog's fur. Use fabric glue or double-sided tape to attach ribbons securely. Make small bows and stick them evenly along the collar. This method keeps the collar light and flexible. Ribbons also make the collar look festive for special occasions.
Attaching Charms
Charms add personality to the collar with little details. Select charms that are small and smooth to avoid hurting your dog. Use key rings or small clips to hang charms from the collar’s D-ring or holes. You can change charms often for a fresh look. Charms can be letters, shapes, or tiny toys. This makes your dog’s collar fun and eye-catching.
Personalizing With Paint Or Markers
Paint and markers let you add names, patterns, or symbols. Use fabric paint or permanent markers for lasting designs. Draw simple shapes or write your dog’s name clearly. Let the paint dry fully before using the collar. This technique works well on plain nylon or canvas collars. Personalizing makes the collar easy to recognize and special for your dog.
Safety Tips
Making a dog collar without sewing is fun and creative. Safety is very important. A collar must be safe for your dog to wear all day. Use strong materials and check them often. Avoid anything that can hurt your dog’s skin or make the collar fall apart. Keep your dog’s comfort and safety in mind at every step.
Choosing Non-toxic Materials
Pick materials that are safe for pets. Avoid plastics or fabrics with harmful chemicals. Natural fibers like cotton or hemp work well. Check labels for non-toxic and pet-safe signs. Your dog may lick or chew the collar. Use materials that won’t cause allergies or sickness.
Checking For Durability
Make sure the collar holds strong during play and walks. Test each part by pulling gently. Use sturdy buckles and clips that won’t break easily. Avoid thin or weak strings that might snap. A durable collar keeps your dog safe and prevents escapes.
Regular Inspection
Look at the collar every week. Check for wear and tear, loose parts, or frayed edges. Fix or replace the collar if you see damage. Keep your dog’s collar clean to prevent skin problems. Regular inspection avoids accidents and keeps your dog comfortable.
Troubleshooting Common Issues
Making a dog collar without sewing can be simple and fun. Still, some common issues may arise during the process. These problems can affect the collar's durability and comfort for your pet. Troubleshooting these issues early helps keep the collar strong and safe. This section covers key fixes and tips to improve your no-sew collar project.
Fixing Loose Ends
Loose ends can make the collar look unfinished and weak. Use strong glue to secure any frayed or loose fabric edges. Apply a small amount of fabric glue and press the ends firmly. Let the glue dry completely before using the collar. Another option is to fold the loose ends under and hold them in place with double-sided tape. This prevents unraveling and keeps the collar neat.
Preventing Collar Fraying
Fraying happens when fabric threads start to come apart. Protect the collar edges by applying clear nail polish or fabric sealant. These liquids stop threads from loosening. Allow the sealant to dry fully before handling the collar. You can also use heat to seal synthetic fabrics carefully. Gently run a lighter or candle flame near the edges to melt the fibers slightly. Be cautious not to burn the material or yourself.
Adjusting Fit Over Time
Dogs grow and change size, so collar fit may need adjustment. Use adjustable buckles or Velcro strips for easy resizing. Check the collar fit regularly to avoid tightness or looseness. A good rule: you should fit two fingers between the collar and your dog’s neck. If the collar feels too loose, tighten the strap and secure it again. For bigger sizes, replace the collar or add extra material safely.
Credit: www.etsy.com
Frequently Asked Questions
What Materials Are Needed To Make A Dog Collar Without Sewing?
You need fabric or nylon straps, strong adhesive, a buckle, and D-ring. Scissors and measuring tape are essential. These materials ensure a durable, no-sew dog collar.
How Do I Ensure The Collar Fits My Dog Correctly?
Measure your dog's neck with a flexible tape. Add two inches for comfort. Adjust the collar length before gluing or assembling.
Can I Make A Durable Dog Collar Without Sewing?
Yes, using strong fabric glue or adhesive tape creates a durable collar. Choose weather-resistant materials to enhance longevity and strength.
Is It Safe To Use Glue For Dog Collars?
Use non-toxic, pet-safe glue designed for fabric or outdoor use. Avoid toxic adhesives to ensure your dog’s safety.
Conclusion
Making a dog collar without sewing is simple and fun. You only need basic materials and tools. This method saves time and money. Plus, you can create a collar that fits your dog perfectly. Try different colors and designs to match your pet’s style.
Always check the collar for safety before use. Enjoy crafting a unique collar with your own hands. Your dog will love the comfort and care you put into it. Keep practicing to improve your skills. Making collars this way is a great DIY project anyone can do.