
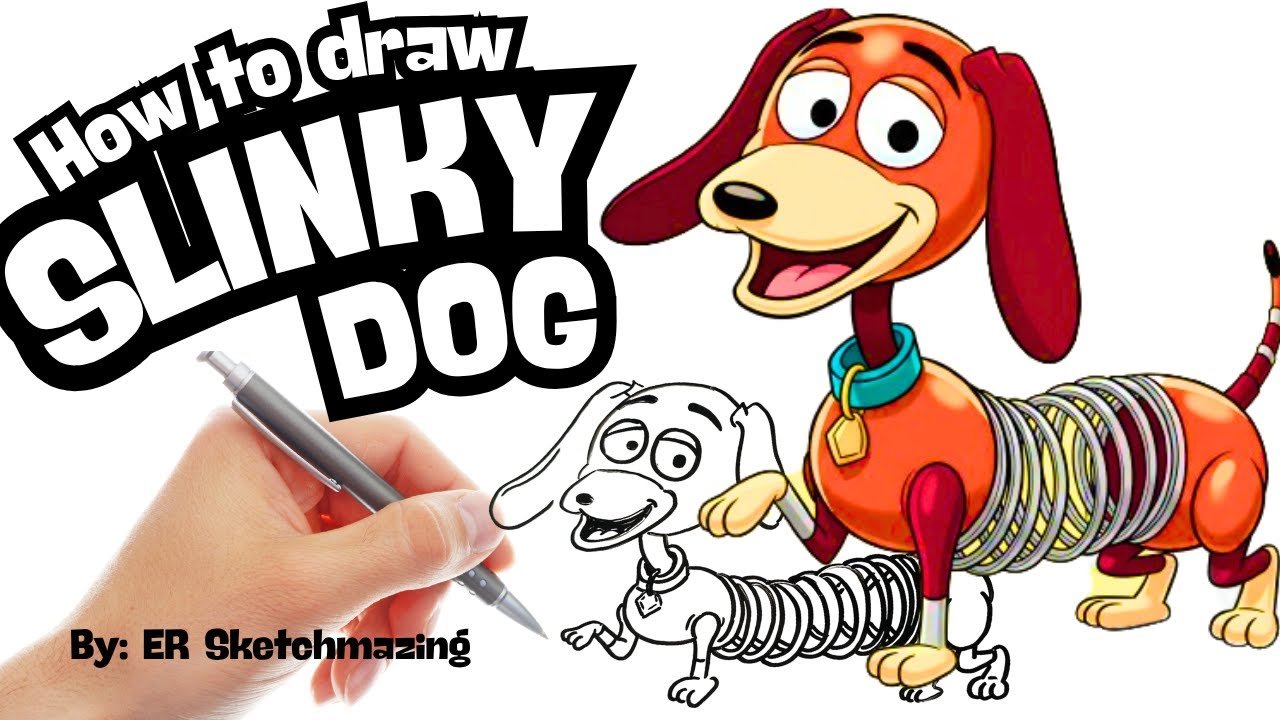
Have you ever wanted to bring your favorite Toy Story character to life on paper? Drawing Slinky Dog might seem tricky, but with the right steps, you can create a fun and detailed sketch that captures his playful spirit.
Whether you’re a beginner or just looking to improve your skills, this guide will make drawing Slinky Dog easy and enjoyable. Keep reading, and by the end, you’ll have a cool drawing you’ll be proud to show off!
Materials Needed
Before you begin drawing Slinky Dog from Toy Story, gathering the right materials makes all the difference. Having everything on hand keeps your creative flow steady and helps you focus on the fun of sketching. You don’t need fancy tools—just a few basics to bring Slinky Dog to life on paper.
Drawing Tools
- Pencils:Start with a standard HB pencil for sketching outlines. A softer pencil (2B or 4B) works great for shading and adding depth.
- Eraser:A clean, soft eraser helps fix mistakes without damaging your paper.
- Sharpener:Keep your pencil tips fine for detailed lines.
Paper Choices
- Sketchbook or Drawing Paper:Choose smooth, medium-weight paper that can handle erasing and shading.
- Colored Paper (Optional):If you want to add color later, thicker paper can prevent bleeding from markers or paints.
Coloring Supplies
- Colored Pencils:Perfect for adding vibrant shades and highlights to your drawing.
- Markers or Fine Liners:Use these for bold outlines and details.
- Crayons or Watercolors:If you prefer a softer, blended look, these can be great choices.
Have you ever started drawing only to realize you’re missing a crucial tool? Keeping your materials organized saves time and frustration. What materials do you find most helpful when drawing your favorite characters?
Basic Shapes And Proportions
Drawing Slinky Dog begins with understanding his basic shapes and proportions. These simple forms help capture his playful character accurately. They act as a guide for placing details later.
Start by breaking down Slinky Dog’s body into circles and ovals. His head is a rounded rectangle with a slightly curved snout. The body looks like an elongated oval to show his slinky middle section.
Proportions matter to keep Slinky Dog looking balanced. His legs are short and stubby, placed evenly under the body. The spring coil in the middle should be drawn with several curved lines to mimic the real toy’s shape.
Identifying Basic Shapes
- Head: Rounded rectangle
- Snout: Small oval
- Body: Long oval
- Legs: Short rectangles
- Coil: Curved lines forming a spring
- Tail and ears: Small ovals and triangles
Maintaining Correct Proportions
Keep the head size moderate compared to the body. The spring coil should fill the space between head and hind legs. Legs should appear sturdy but not too large.
Observe the distance between body parts. The space between front legs and coil is shorter than between coil and hind legs. This helps show Slinky Dog’s stretched shape.
Sketching Guidelines For Placement
- Draw a horizontal line for body alignment
- Add vertical lines to mark leg positions
- Use circles to map out joints
- Mark coil edges with curved guide lines
Sketching The Head
Sketching the head of Slinky Dog is where the character truly starts to come alive. This part sets the tone for the playful and friendly expression that makes Slinky Dog so recognizable. Pay close attention to the shapes and proportions here, as they form the foundation for the details that follow.
Drawing The Eyes And Nose
Begin by lightly sketching two large oval eyes close together near the center of the head. Position them slightly tilted to give Slinky Dog his curious, lively look. Adding small circles inside the ovals for pupils will bring instant life to your drawing.
Next, draw a rounded nose just below the eyes. Slinky’s nose is slightly oval and points outward, so keep it simple but prominent. Think about how the nose sits on a snout, which will help you later add dimension and shading.
Adding The Ears
Slinky Dog’s ears are long and floppy, hanging down on either side of his head. Sketch them as elongated ovals starting from just above the eyes, curving naturally downward. Don’t worry about perfect symmetry—quirky differences in the ears add character.
Remember to keep your lines light at this stage. This way, you can adjust the ears’ position and shape to match the playful and relaxed vibe of Slinky Dog. How do your ears affect the overall expression of your drawing?

Credit: www.youtube.com
Creating The Body And Slinky
Creating the body and slinky for your Slinky Dog drawing is where the character truly comes to life. This part combines simple shapes and careful details to capture Slinky’s unique look. Focusing on these areas will help your drawing feel both playful and true to the original toy.
Forming The Torso
Start by sketching two oval shapes to represent the front and back parts of Slinky Dog’s body. These ovals don’t have to be perfect but try to keep them roughly the same size to maintain balance.
Connect the ovals with two parallel lines. These lines form the sides of the torso and give space for the slinky coil in between.
Have you noticed how Slinky’s torso looks like it’s stretched but still flexible? Capturing this stretch adds energy to your drawing and hints at the toy’s springy nature.
Detailing The Slinky Coil
The slinky coil is the heart of Slinky Dog’s design. Begin by drawing a series of curved lines that wrap around the space between the two ovals. These curves should flow smoothly and evenly to show the coil’s spiraled shape.
Use short, parallel strokes to suggest the metallic texture. Adding small highlights or reflections with white space can make the coil appear shiny and three-dimensional.
Think about how the coil compresses and expands. Try drawing the coils tighter near the edges and slightly looser in the center to give a realistic sense of movement.
Drawing The Legs And Tail
Drawing Slinky Dog's legs and tail can be a fun challenge. These parts give him his unique, playful look. Getting the legs right helps show his movement, while the tail adds that iconic springy feel.
Sketching The Front And Back Legs
Start by drawing two sets of legs: front and back. Use simple oval shapes for the paws and connect them with slightly curved lines to form the legs. Keep the legs short and a bit chubby to match Slinky Dog’s cartoon style.
Remember, the front legs should look slightly bent, as if he’s ready to move. The back legs can be drawn straighter but maintain a relaxed pose. This helps give your drawing a natural, lively stance.
Adding Details To The Legs
Once the basic shapes are down, add details like the toes and the pads on the paws. Use small curves or short lines to separate the toes. This little detail makes the legs look more realistic and playful.
Don’t forget to draw the joints clearly. You can do this by adding small circles or ovals where the legs bend. This helps you visualize how Slinky Dog’s legs connect to his body and adds depth to your drawing.
Creating The Springy Tail
Slinky Dog’s tail is what makes him special. Begin by sketching a long, thin spiral to capture the coiled spring look. Make sure the spiral has a smooth, flowing shape without sharp edges.
The tail should taper slightly as it moves away from the body. This gives the impression of the spring stretching and relaxing. Try drawing the tail in different angles to see what feels most dynamic for your pose.
Final Touches On The Tail And Legs
Look over your legs and tail for any rough edges or uneven lines. Smooth out the curves to keep Slinky Dog’s friendly, animated vibe. Adding a few shading lines on the tail’s coils can make it pop off the page.
Try moving your drawing around and ask yourself: Does this tail look like it could bounce? Are the legs ready to spring into action? These questions help you add energy and personality to your artwork.
Adding Details And Texture
Adding details and texture brings your Slinky Dog drawing to life. These elements give depth and character to the sketch. Focus on small features that make Slinky Dog unique. Use light strokes to build up texture gradually. This step helps your drawing look more realistic and fun.
Facial Features
Start with Slinky Dog’s eyes. Draw two large, rounded eyes close together. Add small circles inside for pupils. Leave a tiny white spot inside each pupil to show light reflection. This makes the eyes look lively and bright.
Next, sketch his nose. It is oval and sits at the front of his face. Shade it slightly for depth. Draw his smiling mouth with a curved line below the nose. Add a small tongue peeking out for a playful touch.
Don’t forget the ears. They are long and floppy. Use soft, curved lines to show their shape. Add some shading inside the ears to create depth.
Body Patterns
Slinky Dog’s body is special because of his spring. Draw thin, curved lines around the middle to show the coils. Make sure the coils wrap naturally around his body. Shade between the coils lightly to add texture.
His front and back legs have smooth fur. Use short, quick strokes along the legs. This shows the fur’s direction and softness. Draw small ovals for his paws and add tiny lines for claws.
Don’t forget the tail. It looks like a small spring too. Use curved lines like the body’s coils. Add a small tuft of fur at the end with short strokes.
Inking Your Drawing
Inking your drawing brings your Slinky Dog sketch to life. This step turns rough pencil lines into clear, bold outlines. It helps your drawing look clean and ready for color. Use smooth, confident strokes to keep lines neat. Take your time and avoid rushing. A steady hand makes a big difference.
Choose the right tools for inking. Fine-tipped pens work well for details. Thicker pens add weight to main outlines. Test your pens on scrap paper first. Make sure the ink flows smoothly and doesn’t smudge.
Preparing Your Drawing For Inking
Erase extra pencil marks lightly. Keep the main sketch visible but faint. This helps avoid confusion while inking. Use a clean, flat surface with good light. Hold your pen comfortably for better control.
Inking The Main Outlines
Start with the big shapes of Slinky Dog’s body. Trace over your pencil lines with steady strokes. Use thicker lines on outer edges. This adds depth and focus to your drawing. Keep your hand relaxed to avoid shaky lines.
Adding Details And Textures
Switch to a finer pen for small parts. Ink the eyes, nose, and mouth carefully. Draw the coils of the spring with smooth curves. Add texture lines on the fur and metal parts. These details make your drawing more lively.
Fixing Mistakes And Final Touches
Use a white gel pen or correction fluid for small errors. Wait for the ink to dry before fixing mistakes. Check your drawing for any missing lines. Darken areas that need more contrast. Your Slinky Dog drawing will look crisp and complete.
Coloring Tips
Coloring Slinky Dog from Toy Story can bring your drawing to life. Using the right colors and techniques adds depth and fun to your artwork. Focus on capturing Slinky's unique look with bright and smooth colors.
Choose colors that match Slinky's classic design. Pay attention to the contrast between his brown head and the metal spring body. Soft shading helps give your drawing a 3D effect.
Choosing The Right Colors
Select warm browns for Slinky's head and ears. Use a lighter brown for his snout and belly. For the spring body, pick metallic greys and silvers to mimic metal parts.
Using Shading For Depth
Shade darker near the edges to create shadows. Blend lighter tones in the middle to show light reflection. This technique makes Slinky look round and lively.
Highlighting Key Features
- Brighten his eyes with white highlights.
- Add a soft shine on the nose.
- Use subtle strokes on the spring to show its coil shape.
Blending Colors Smoothly
Use colored pencils or markers to blend colors gently. Layer colors lightly and build up intensity slowly. This keeps your colors smooth and natural.
Common Mistakes To Avoid
Drawing Slinky Dog from Toy Story is a fun challenge, but many artists hit the same stumbling blocks. Recognizing common mistakes helps you avoid frustration and improve your drawing quickly. Let’s look at some pitfalls that can throw your Slinky Dog off and how to dodge them.
Ignoring Proportions Of The Body And Spring
One of the biggest mistakes is getting the size of Slinky Dog’s body parts wrong. The spring section should be clearly distinct and not too short or overly stretched compared to the head and tail.
I once made the spring too small, and it looked like a tight coil instead of the flexible midsection. Try measuring the spring length against the head to keep it balanced.
Overcomplicating The Details
Adding too many tiny details can overwhelm the drawing and make Slinky Dog look cluttered. Focus on the main shapes first—the head, ears, spring, and paws.
Ask yourself, does each line add to the character or just confuse the look? Simplify your lines for a cleaner, more recognizable sketch.
Misplacing Facial Features
Getting the eyes, nose, and mouth out of place changes Slinky Dog’s expression dramatically. His eyes should be close together, giving him that friendly, curious look.
When I shifted the eyes too far apart, it lost the character’s charm. Use light guidelines to position facial features before finalizing them.
Neglecting The Spring’s Curvature
The spring isn’t just a straight line; it has a natural curve that adds life to the drawing. Drawing it too rigid or perfectly circular will make the dog look stiff.
Try sketching gentle waves to mimic the spring’s movement. Can you see how that adds personality and energy?
Wrong Perspective And Angles
Drawing Slinky Dog from the wrong angle can confuse viewers and make the figure look flat or distorted. Keep the perspective consistent, especially with the spring’s coils wrapping around.
Before you finalize, step back and check: does the angle feel natural? Adjust if something looks off to keep your drawing believable.

Credit: www.youtube.com
Final Touches
Final touches give your Slinky Dog drawing life and personality. Small details make the figure look complete and more real. Focus on refining lines, adding shadows, and highlighting key features. This step makes your artwork stand out and feel polished.
Enhancing The Facial Expression
Darken the eyes and add a small shine to them. This makes Slinky Dog's eyes look bright and lively. Draw thin lines around the mouth to show his friendly smile. Check the nose and ears for any missing details and fix them.
Adding Texture To The Slinky Coil
Use curved lines to show the coil’s springy shape. Shade the edges slightly to give it depth. Draw small shadows between the coils for a 3D effect. Keep the lines neat and consistent for a smooth look.
Refining The Body And Legs
Trace over the body outline with a darker pencil or pen. Erase any stray sketch marks carefully. Add tiny lines for the fur texture on the legs and tail. Make the legs look sturdy by shading underneath them.
Final Shading And Highlights
Use soft shading on the body to show light and shadow. Highlight curved areas where light hits directly. Blend shading gently for a smooth transition. Avoid heavy shading that can hide details.

Credit: www.etsy.com
Frequently Asked Questions
How Do I Start Drawing Slinky Dog From Toy Story?
Begin with a simple sketch of Slinky's head and body shapes. Use light pencil strokes to outline the basic forms before adding details.
What Materials Are Best For Drawing Slinky Dog?
Use pencils for sketching and fine liners for details. Colored pencils or markers work well for adding vibrant colors to your drawing.
How Can I Draw Slinky Dog’s Spring Body Accurately?
Draw the spring as a series of connected loops. Keep the loops evenly spaced and curved to mimic the slinky’s coil appearance.
What Are Common Mistakes To Avoid When Drawing Slinky Dog?
Avoid disproportionate head or body sizes. Also, ensure the spring is not too tight or too loose to maintain realism.
Conclusion
Drawing Slinky Dog from Toy Story is a fun activity. With simple steps, anyone can create this iconic character. Practice makes the process easier and improves your skills. Remember to enjoy each step while sketching. Mistakes are part of learning, so don't worry about them.
Try to add your own style to the drawing. This makes it unique and personal. Share your Slinky Dog with friends and family. They will appreciate your effort and creativity. Keep drawing and exploring new characters. Your artistic journey is just beginning.