
Do you have a high bed that your dog struggles to climb onto? Building dog steps can make a huge difference for your furry friend’s comfort and safety.
Imagine your dog easily reaching their favorite spot without any jumps or risks of injury. In this guide, you’ll learn simple, step-by-step instructions to create sturdy, stylish dog steps that fit perfectly beside your bed. Keep reading to discover how you can improve your dog’s daily life with a project that’s easier than you think.

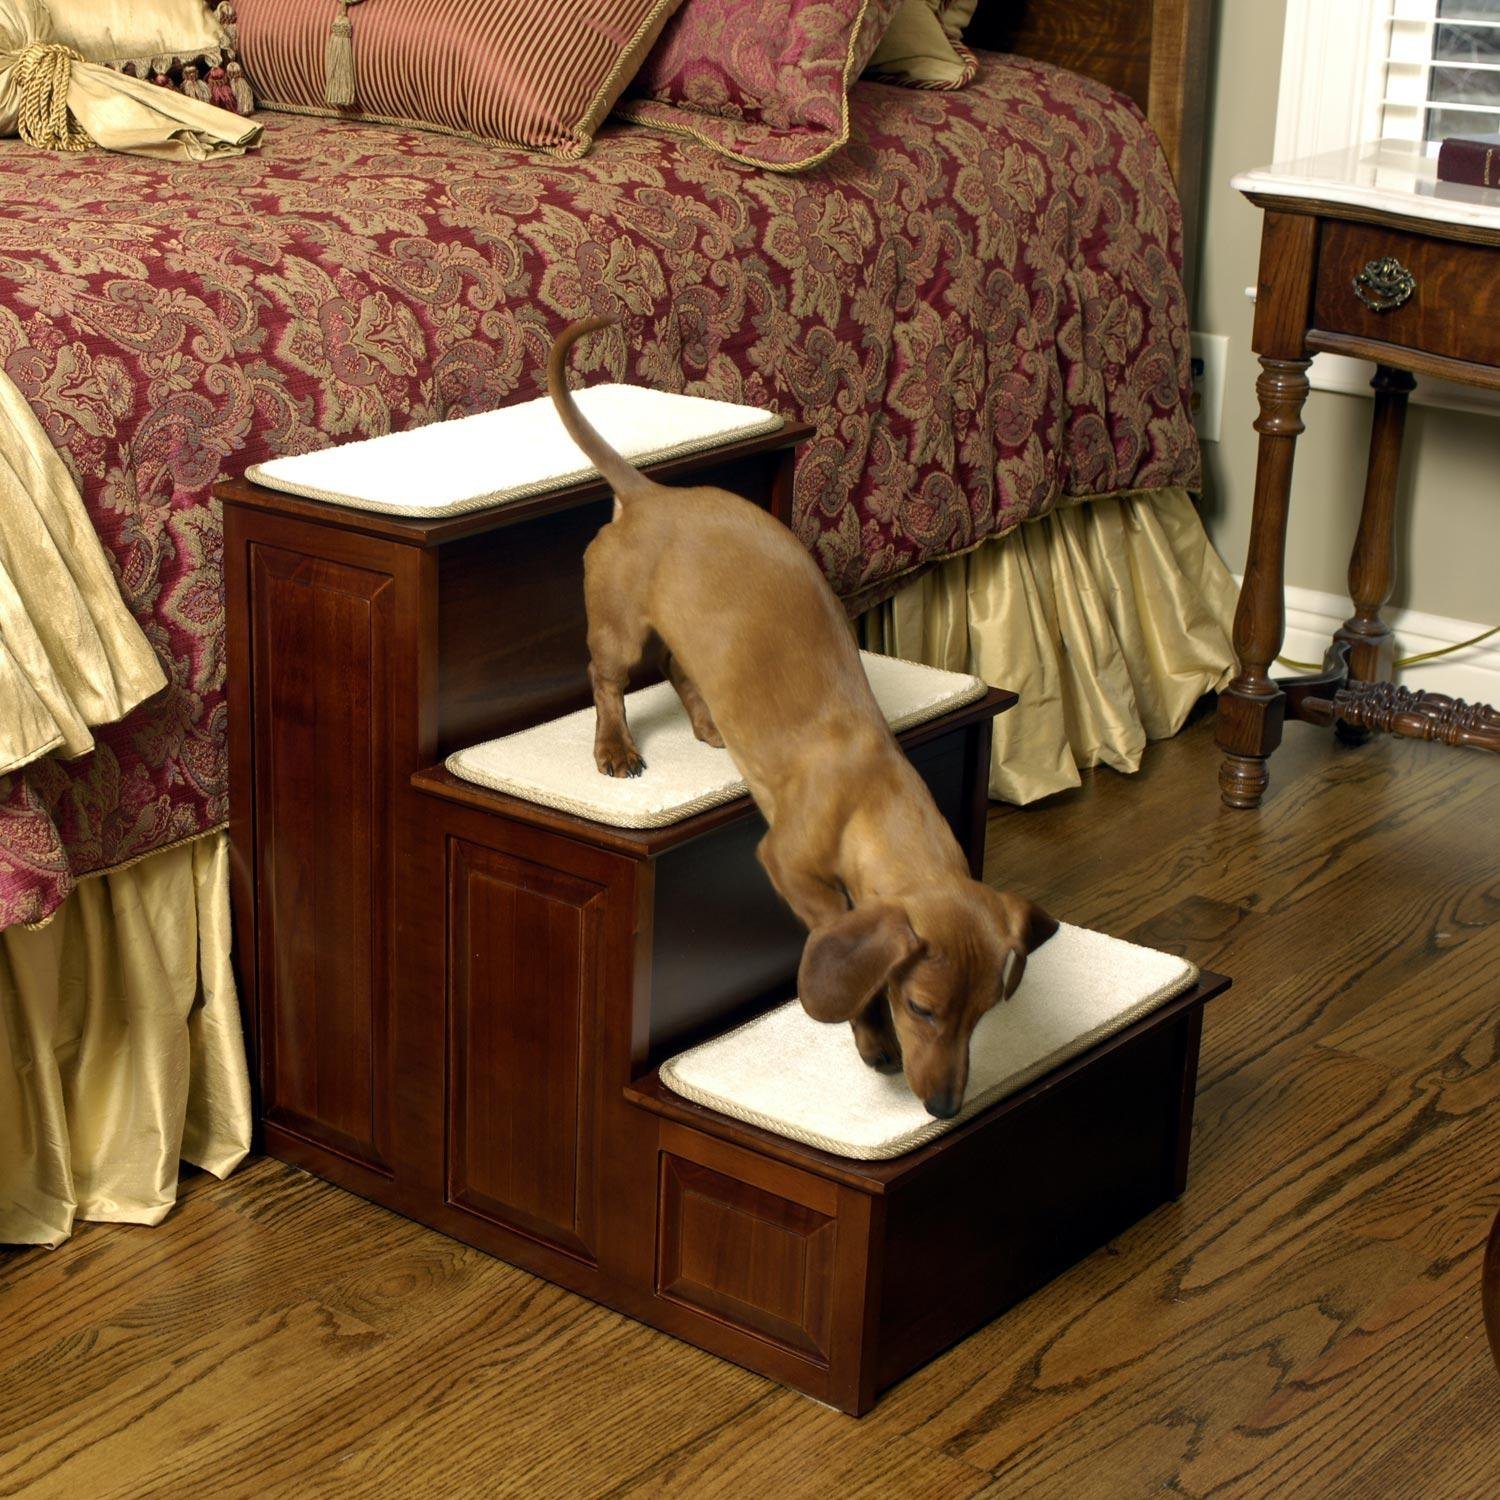
Credit: www.amazon.in
Materials Needed
Building dog steps for high beds is a rewarding project that needs the right materials to ensure safety and durability. Before you start cutting or assembling, gather everything to keep your workflow smooth and efficient. Choosing the proper materials can also affect how comfortable and stable the steps will be for your furry friend.
Wood Types
Picking the right wood is crucial because it affects the strength and appearance of the steps. Pine is a popular choice since it’s affordable and easy to work with, but hardwoods like oak or maple offer greater durability and look nicer.
Think about where the steps will be placed. If they might get wet or dirty, pressure-treated wood or cedar can resist moisture and decay better. Which wood would you want your dog to step on daily?
Tools Required
Having the right tools on hand makes the building process faster and more precise. Essential tools include a saw (circular or miter saw), a drill with bits, a measuring tape, and a screwdriver.
You’ll also need sandpaper or a power sander to smooth the edges, ensuring your dog’s paws won’t get scratched. Do you have these tools ready, or is it time to visit the hardware store?
Additional Supplies
Besides wood and tools, some extra supplies help finish the project neatly and safely. Grab wood screws or nails to hold everything together firmly.
Non-slip adhesive strips or carpet pieces add traction, preventing slips during use. Plus, wood glue can strengthen joints. Don’t forget a good wood finish or paint that’s safe for pets to protect the wood and make cleaning easier.
Measuring Your Bed And Dog
Creating dog steps for high beds begins with precise measurements. Accurate sizing ensures safety and comfort for your pet. Measure both the bed height and your dog’s size carefully.
These measurements guide the height and width of each step. Proper planning prevents accidents and makes climbing easier. Knowing your dog’s needs helps build steps that fit perfectly.
Height Assessment
Measure from the floor to the top of the bed frame. Use a tape measure for accuracy. Record this height to determine the number of steps needed.
Divide the total height into smaller, even steps. Each step should be no taller than your dog can comfortably climb. This prevents strain on joints and muscles.
Step Size And Width
Step depth matters for your dog’s paw size. Measure your dog’s paw length and add extra space for comfort. Width should be wider than your dog’s body.
Wider steps provide better stability and confidence. Avoid narrow steps that may cause slipping or hesitation. Aim for a balance between size and space in your design.
Considering Dog’s Comfort
Observe how your dog moves and rests. Consider their age, size, and mobility. Older dogs may need shorter steps with softer edges.
Use non-slip materials for step surfaces. Soft padding can reduce impact on paws. Comfort ensures your dog will use the steps regularly and safely.
Cutting The Wood
Cutting the wood accurately is a crucial part of building sturdy dog steps for your high bed. It sets the foundation for a safe and reliable structure that your furry friend can use with confidence. Taking your time during this phase will save you from headaches during assembly and ensure the final product lasts for years.
Marking The Pieces
Start by carefully measuring each piece of wood according to your design. Use a pencil to mark clear, precise lines where you'll make your cuts. Double-check your measurements—especially the width and height of each step—to avoid any surprises later.
Consider using a square or straight edge to keep your lines perfectly straight. This small step helps prevent uneven cuts that can make the steps unstable. Have you ever noticed how a tiny misalignment can throw off the whole project? Getting this right early on helps you avoid that.
Safe Cutting Techniques
Safety should be your top priority while cutting wood. Always wear protective gear like goggles and gloves to shield yourself from dust and splinters. Secure the wood firmly using clamps before you start cutting to keep it from shifting unexpectedly.
Choose the right saw for your cuts. A circular saw works great for straight cuts, while a jigsaw handles curves better. Take slow, steady strokes and let the saw do the work—pushing too hard can cause rough edges or even kickback.
Have you thought about your workspace setup? Good lighting and a clean area free of clutter help you focus and reduce accidents. Cutting wood can be satisfying, but it demands respect and attention to detail.
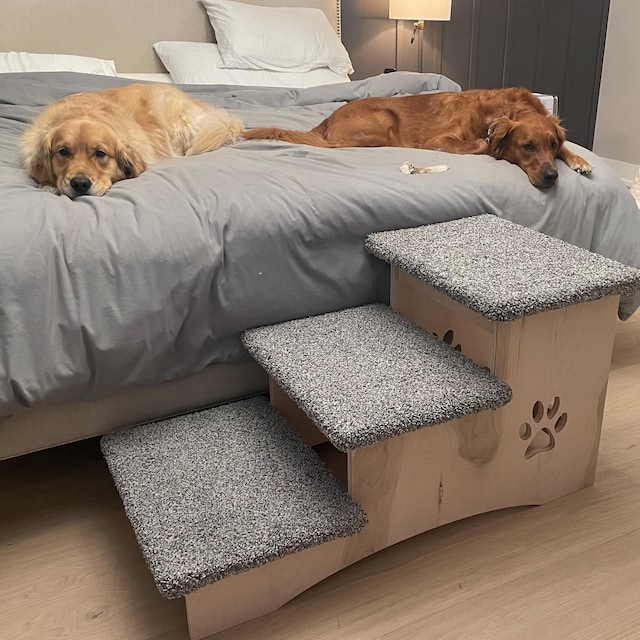
Credit: ariawooddesigns.com
Assembling The Steps
Assembling your dog steps is where the project starts to take shape. This part requires patience and attention to detail to ensure the steps are safe and comfortable for your furry friend. Let's focus on how to properly attach the risers and treads, and then make sure everything is stable.
Attaching The Risers And Treads
The risers are the vertical pieces that give your steps their height, while the treads are the horizontal parts your dog will step on. Start by aligning a tread on top of two risers, making sure the edges are flush. Use wood glue along the contact surfaces before securing them with screws to keep everything tight and durable.
It helps to pre-drill holes to avoid splitting the wood, especially if you are using hardwood. You might want to clamp the pieces together as you screw them in to keep them perfectly aligned. Taking your time here pays off—crooked steps can confuse your dog and make climbing unsafe.
Ensuring Stability
Stability is crucial for dog steps, especially if your bed is high. After assembling each step, place it on a flat surface and give it a gentle shake. If it wobbles, you need to reinforce it with additional screws or brackets.
Adding non-slip pads to the bottom of the steps prevents sliding on smooth floors. You can also attach a small support brace under each step for extra strength. Have you noticed your dog hesitates on unstable surfaces? Stability builds their confidence and keeps them coming back to use the steps.
Finishing Touches
The finishing touches on your dog steps not only improve their look but also make them safer and more comfortable for your pet. Paying close attention to details can turn a simple set of steps into a durable, attractive, and pet-friendly accessory. These final steps ensure your project stands the test of time and daily use.
Sanding Edges
Sharp edges or rough surfaces can hurt your dog’s paws. Take time to sand down all corners and edges smoothly. Use medium-grit sandpaper first, then finish with fine-grit for a soft touch.
Don’t rush this part. A well-sanded step feels better to walk on and looks more polished. Imagine your dog’s comfort every time they climb up or down—would you want to step on splinters?
Painting Or Staining
Choose a paint or stain that is safe for pets and suits your home décor. Applying a protective coat not only enhances the wood's appearance but also guards against scratches and moisture.
Try using non-toxic, water-based options. They dry quickly and don’t emit strong odors that could bother your furry friend. Adding a clear sealant on top can boost durability without changing the color.
Adding Non-slip Surfaces
Prevent slips by attaching non-slip strips or pads to each step. Materials like rubber treads or adhesive grip tape work well and are easy to install.
Think about your dog’s traction needs, especially if they have mobility issues. A secure grip will boost their confidence and help avoid accidents. Would you want to climb slippery stairs yourself?
Safety Tips For Your Dog
Ensuring your dog's safety is key when building steps for high beds. The steps must be stable and secure. Your dog should feel confident using them every day. Simple safety measures can prevent injuries and accidents.
Securing The Steps
Attach the steps firmly to the bed or floor. Use strong brackets or non-slip pads to keep them from moving. Check that the steps do not wobble or shift under pressure. Choose materials with good grip to prevent slipping. Avoid sharp edges or splinters that could hurt your dog’s paws.
Regular Maintenance
Inspect the steps often for damage or wear. Tighten screws and bolts regularly to maintain stability. Replace any broken or worn parts immediately. Clean the steps to remove dirt and debris that cause slipping. Regular care keeps the steps safe and comfortable for your dog.
Alternative Designs
Exploring alternative designs for dog steps can make your project more adaptable and user-friendly. Not every home or dog benefits from the same style, so it's smart to consider options that fit your space and your pet's needs. These designs can also save space or add convenience, making daily use simpler for both you and your dog.
Foldable Steps
Foldable dog steps are great if you need to save space or want the steps to be portable. You can easily tuck them away when not in use, which is perfect for smaller rooms or if you travel with your pet. Building foldable steps requires hinges that lock securely, ensuring your dog’s safety while climbing.
Choose sturdy materials like hardwood or strong plywood to hold your dog's weight. Adding non-slip surfaces on each step is essential to prevent slips, especially when the steps fold out. Have you thought about how often you’ll move the steps? This can guide your choice of hinges and locking mechanisms.
Ramp Options
Ramps offer a smooth incline instead of steps, which is easier on dogs with joint issues or smaller breeds that struggle with stairs. You can build a ramp using plywood with side rails for safety, making sure the incline isn’t too steep for your dog to climb comfortably. A gentle slope encourages your dog to use it without hesitation.
Adding a textured, non-slip surface is crucial to keep your dog steady on the ramp. Consider adjustable legs or supports to change the ramp’s height as needed. Have you tested your dog’s comfort level on different ramp angles? This can help you customize the design for your pet’s best experience.
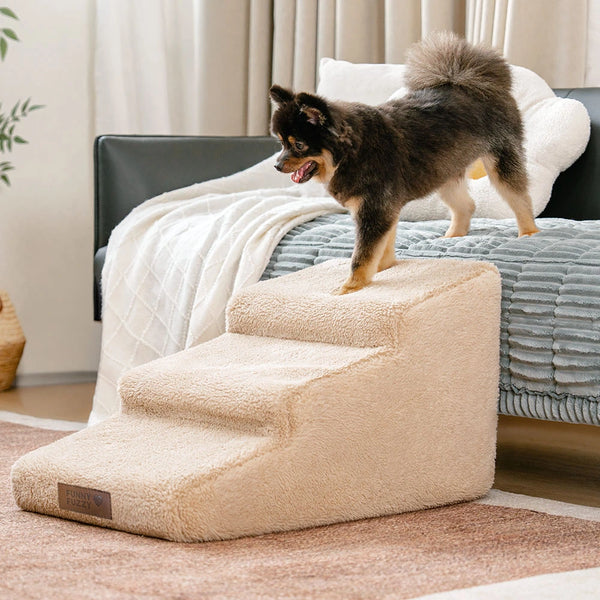
Credit: funnyfuzzy.com
Frequently Asked Questions
How Do I Choose Materials For Dog Steps?
Select sturdy, non-toxic wood like pine or oak. Ensure materials support your dog's weight. Avoid slippery surfaces by adding grip tape or carpet.
What Tools Are Needed To Build Dog Steps?
Basic tools include a saw, drill, measuring tape, screws, and sandpaper. Optional items: wood glue and paint for finishing.
How High Should Dog Steps Be For High Beds?
Steps should match your bed height. Each step height between 6-8 inches is comfortable and safe for dogs.
How Do I Ensure Dog Steps Are Safe?
Securely fasten all parts, smooth edges, and add non-slip surfaces. Test stability before use to prevent accidents.
Conclusion
Building dog steps for high beds is simpler than it seems. Start with basic materials like wood or sturdy plastic. Measure your bed's height carefully. Cut the pieces accurately for stability. Assemble the steps with screws or strong glue. Sand any rough edges for safety.
Test the steps with your dog before regular use. Ensure they feel comfortable and confident. Customizing the design adds personal touch. Your dog will appreciate this thoughtful effort. Safe steps mean happy, stress-free access. Enjoy the peace of mind knowing your pet can climb with ease.