
If your dog struggles with stairs or jumping onto furniture, building a ramp can make a huge difference. Imagine giving your furry friend an easy way to reach their favorite spots without pain or strain.
You might think it’s complicated, but creating a sturdy, safe ramp is simpler than you expect. In this guide, you’ll discover step-by-step how to build a ramp that fits your dog’s needs perfectly. Ready to make life easier and more comfortable for your best friend?
Let’s get started!
Choosing The Right Materials
Choosing the right materials is essential for building a safe and sturdy dog ramp. The materials affect durability, comfort, and safety. Picking strong wood and adding a non-slip surface will protect your pet from slipping. Having the correct tools makes the building process easier and more precise.
Selecting Durable Wood
Use hardwood or treated plywood for strength and weather resistance. Cedar and redwood resist rot and insects, good for outdoor ramps. Avoid softwood as it can crack or splinter easily. Make sure the wood is smooth to protect your dog's paws.
Non-slip Surface Options
Adding a non-slip surface helps prevent accidents. You can use rubber mats, carpet strips, or textured paint. Rubber mats provide good grip and are easy to clean. Carpet strips offer comfort but may wear out faster. Textured paint adds grip and is weather-resistant.
Tools You'll Need
- Measuring tape for accurate dimensions
- Power saw to cut wood pieces
- Drill for screws and holes
- Screwdriver or impact driver
- Sandpaper or electric sander to smooth edges
- Clamps to hold pieces while assembling
Credit: www.vevor.com
Measuring And Planning
Measuring and planning are the first steps in building a safe and effective dog ramp. Careful measurements ensure the ramp fits well and supports your dog comfortably. Thoughtful planning helps create a design that matches your dog's needs and space availability.
Determining Ramp Length
Measure the height from the ground to the surface your dog will climb. Use a tape measure for accuracy. The ramp length depends on this height and how gentle the incline should be. A longer ramp means a gentler slope, easier for your dog to use.
Calculating Slope Angle
Keep the slope angle low to avoid strain on your dog's joints. A slope angle between 18 and 25 degrees works best. Use this simple formula to find the angle:
- Angle = arctangent (height ÷ length)
Choose a length that keeps the angle within this safe range.
Designing For Your Dog’s Size
Consider your dog's weight and paw size. The ramp width should be wide enough for your dog to walk comfortably. A width of 18 to 24 inches suits most dogs. Use non-slip materials to prevent slipping. Strong materials support your dog's weight safely.
Building The Ramp Frame
Building the ramp frame is a crucial part of making a sturdy and safe ramp for your dog. The frame holds the entire structure together. It must be strong enough to support your dog's weight without wobbling. Using the right materials and tools ensures the frame lasts a long time. Follow clear steps to cut, assemble, and reinforce the frame properly.
Cutting The Wood Pieces
Start by choosing quality wood like pine or cedar. These are strong and weather-resistant. Measure the length and width needed for the ramp base. Mark the wood carefully using a pencil and a square tool for straight lines. Use a saw to cut the wood pieces. Cut two long side pieces and several shorter cross pieces. Make sure all pieces are smooth and even to fit well together.
Assembling The Frame
Lay the two long side pieces parallel on a flat surface. Place the shorter cross pieces between them at equal distances. These cross pieces create the steps for the ramp. Use wood screws to attach each cross piece to the side pieces. Check the frame for squareness by measuring diagonals. Adjust before tightening all screws. The frame should feel solid and not move when pressed.
Adding Support Braces
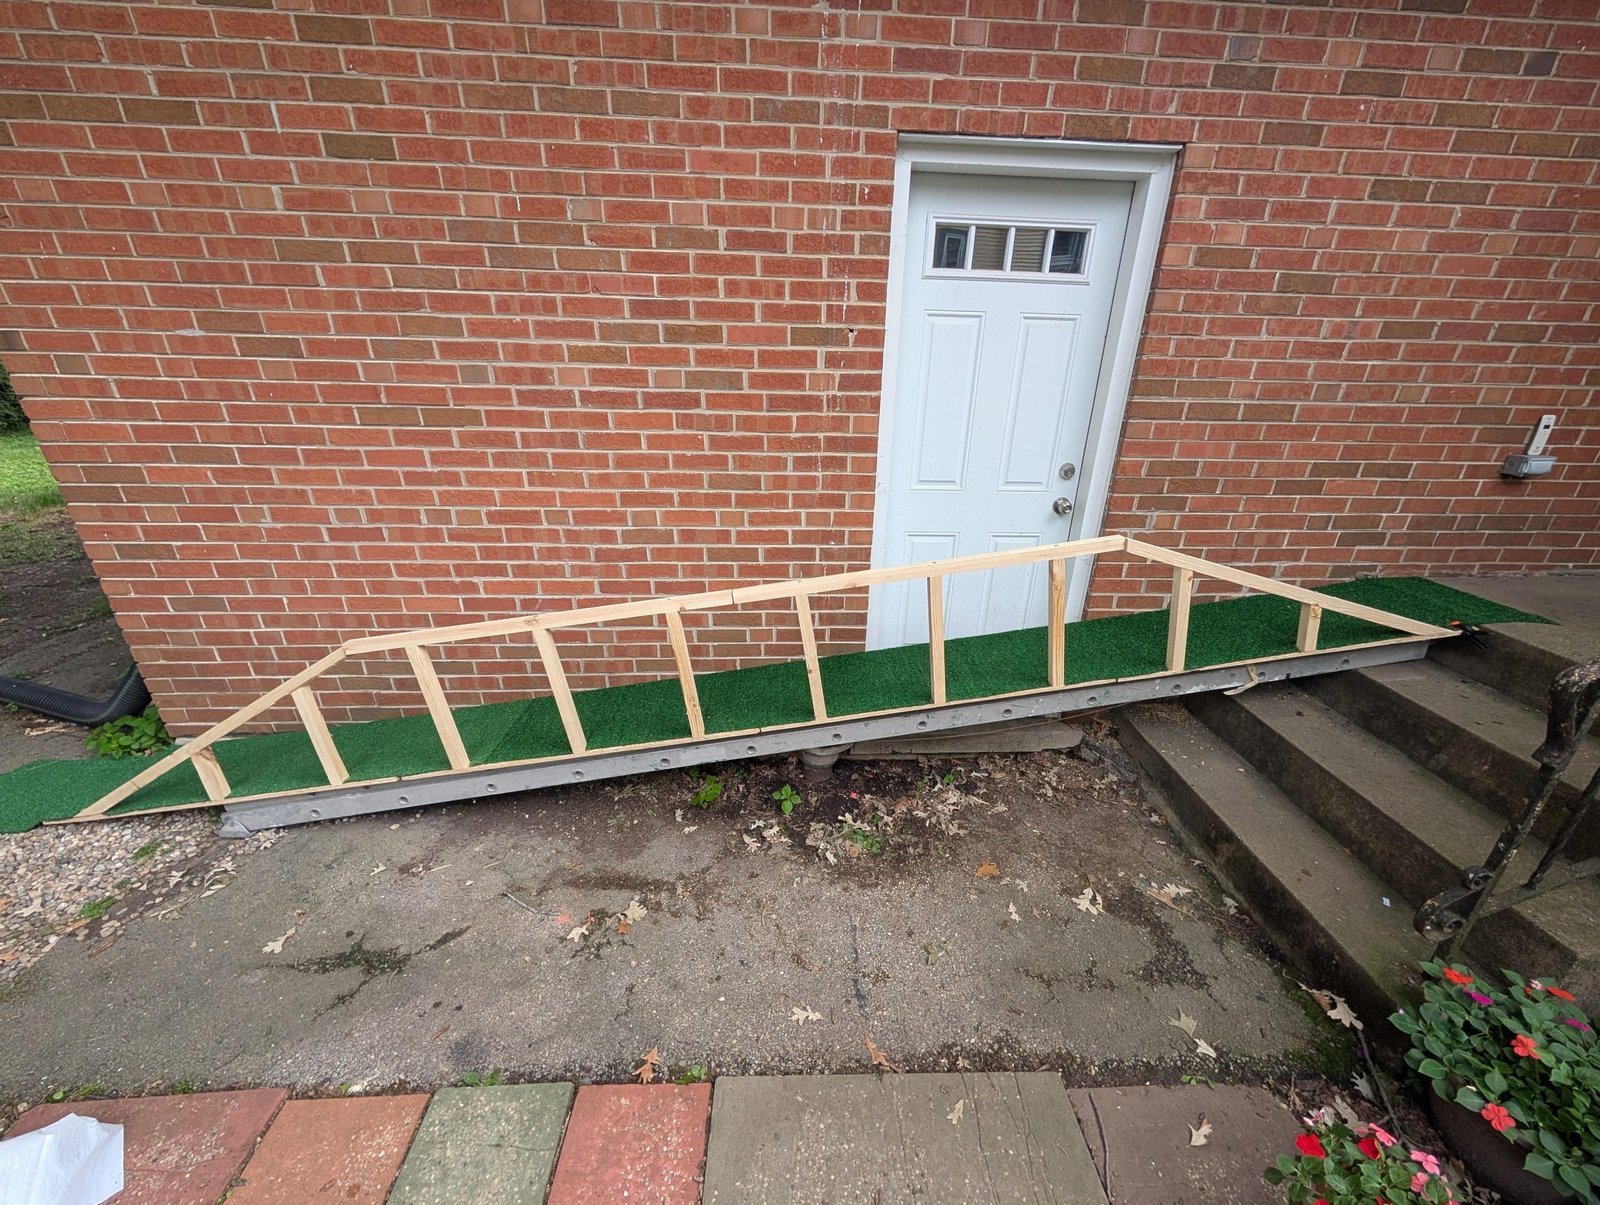
Support braces add extra strength to the ramp frame. Cut small triangular pieces from scrap wood. Attach these braces at each corner where the side and cross pieces meet. Use screws to secure them tightly. Braces prevent wobbling and bending under weight. Place additional braces in the middle of the frame if the ramp is very long. This will keep your dog safe and comfortable while using the ramp.

Credit: www.reddit.com
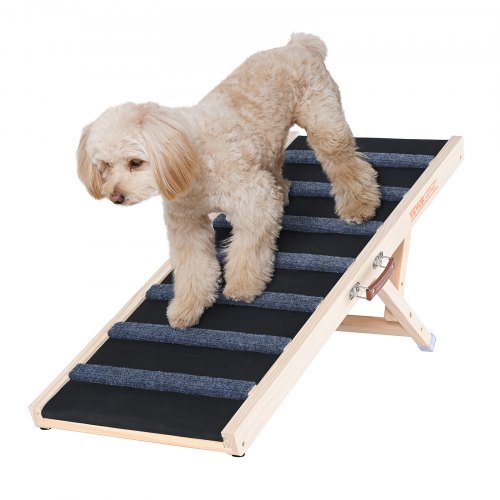
Creating The Ramp Surface
Creating the ramp surface is key for your dog’s safety and comfort. The surface must be strong and easy to walk on. Smooth and slippery surfaces can cause accidents. Proper materials and coatings help your dog climb confidently.
Attaching The Ramp Deck
Choose a sturdy board for the ramp deck, such as plywood or solid wood. Secure the board tightly to the frame using screws. Make sure it does not move or wobble. Check that the edges are smooth to avoid sharp spots. A solid deck supports your dog’s weight safely.
Applying Non-slip Coating
Apply a non-slip coating over the ramp deck to prevent slipping. Use paint or spray designed for outdoor use and traction. Let the coating dry completely before use. This layer adds grip and protects the wood from weather damage. Non-slip surfaces give your dog better footing on the ramp.
Adding Traction Strips
Add traction strips for extra grip and security. Use adhesive strips, rubber mats, or textured tape. Place them evenly along the ramp surface. These strips help dogs with weak paws or older dogs maintain balance. Traction strips reduce the risk of falls on the ramp.
Ensuring Safety And Stability
Ensuring safety and stability is crucial when building a dog ramp. A secure and steady ramp prevents accidents and keeps your dog confident. Careful attention to how the ramp attaches and supports weight helps create a safe pathway. Small adjustments can improve your dog’s comfort and ease of use.
Securing The Ramp To Surfaces
Attach the ramp firmly to the floor or platform. Use non-slip materials like rubber pads or grip tape at contact points. Secure the top end with brackets or screws for strong support. Check connections often to avoid loosening over time. A stable base stops the ramp from shifting during use.
Testing Weight Capacity
Test the ramp before letting your dog use it. Apply pressure equal to or greater than your dog’s weight. Observe for any bending, wobbling, or creaking sounds. Reinforce weak areas with extra supports or stronger materials. Confirm the ramp holds safely under full load to avoid accidents.
Adjusting For Comfort
Adjust the ramp angle to suit your dog’s size and ability. A gentle slope is easier for small or older dogs. Add a textured surface for better grip and traction. Check that the ramp width fits your dog’s body comfortably. Make changes gradually to help your dog adapt without stress.

Credit: www.youtube.com
Maintaining The Ramp
Maintaining your dog's ramp ensures safety and durability. A well-kept ramp lasts longer and stays secure for your pet. Regular care prevents accidents and keeps the ramp clean and strong. Follow simple steps to keep the ramp in top shape year-round.
Regular Inspection Tips
- Check for loose screws and bolts often.
- Look for cracks or splinters on the surface.
- Ensure the ramp is stable and does not wobble.
- Test the grip surface for wear and tear.
- Inspect the ramp’s edges for sharp or rough spots.
Cleaning And Repairs
Clean the ramp regularly to remove dirt and debris. Use mild soap and water for cleaning. Avoid harsh chemicals that can damage the material. Dry the ramp fully to prevent mold or mildew.
Fix minor damages quickly. Tighten screws and replace worn-out parts. Sand down rough areas to avoid splinters. Use waterproof sealant for wooden ramps to protect against moisture.
Seasonal Maintenance
Check the ramp more often during extreme weather changes. Remove snow and ice in winter to prevent slipping. In summer, watch for cracks caused by heat.
Store the ramp indoors if possible during harsh seasons. Cover it with a waterproof sheet to protect from rain. Seasonal care helps keep the ramp safe and usable all year.
Frequently Asked Questions
How Do I Build A Safe Dog Ramp At Home?
Use non-slip materials and sturdy wood for stability. Ensure the ramp’s incline is gentle for easy climbing. Secure the ramp firmly to avoid movement. Add side rails for extra safety. Test the ramp with your dog before regular use.
What Materials Are Best For A Dog Ramp?
Plywood or lightweight wood works well for durability. Use non-slip surfaces like grip tape or rubber mats. Choose weather-resistant materials if used outdoors. Avoid slippery or rough textures to protect your dog’s paws.
What Is The Ideal Slope For A Dog Ramp?
Aim for a slope between 18 and 25 degrees. A gentler incline reduces strain on joints. Steeper ramps can be difficult and unsafe for older dogs. Measure the height your dog needs to climb for accuracy.
How Wide Should A Dog Ramp Be?
Make the ramp at least 18 to 24 inches wide. This width supports dogs of various sizes comfortably. Ensure enough room for your dog to walk without feeling cramped. Wider ramps provide better balance and confidence.
Conclusion
Building a dog ramp can be a rewarding project. It ensures your furry friend moves safely. Start with a plan and gather materials. Follow each step carefully for a sturdy ramp. Always prioritize your dog's comfort and safety. Test the ramp before regular use.
Adjust as needed to fit your dog's needs. Your efforts will make life easier for your pet. A thoughtful ramp can enhance their mobility. Enjoy the satisfaction of helping your dog. Happy building!