
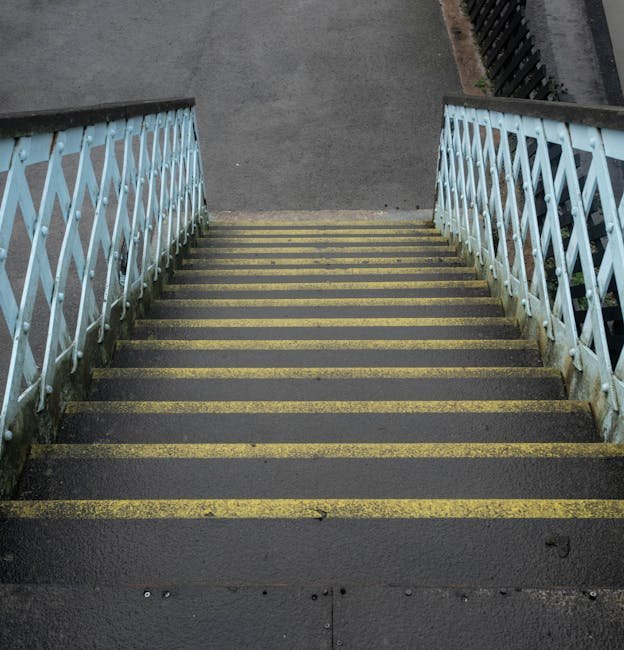
If your dog struggles with stairs, you know how worrying it can be. You want to keep your furry friend safe and comfortable, but stairs can be tricky or even dangerous for them.
Building a dog ramp over stairs is a simple solution that can make a big difference in your pet’s daily life. In this guide, you’ll discover easy steps to create a sturdy, safe ramp that fits your home and helps your dog move around with confidence.
Keep reading, and by the end, you’ll have everything you need to build a ramp your dog will love.
Choosing The Right Materials
Choosing the right materials is crucial when building a dog ramp over stairs. The materials determine the ramp's strength, safety, and durability. Picking poorly can lead to a wobbly or unsafe ramp that your dog won't want to use.
Selecting Durable Wood
Wood is the most common choice for dog ramps because it’s sturdy and easy to work with. Opt for hardwoods like oak, maple, or birch—they hold up well under weight and resist wear better than softwoods. Avoid particle board or plywood that can splinter or weaken over time.
Think about the environment where the ramp will be used. If it’s outdoors or in a humid area, pressure-treated wood or cedar can resist moisture and decay. Your dog’s safety depends on a solid foundation, so don’t cut corners here.
Non-slip Surface Options
Safety is key, especially when your dog is going up or down stairs. Adding a non-slip surface prevents accidents and gives your dog confidence. You can use textured outdoor carpet, rubber mats, or adhesive grip tape designed for stairs.
Have you noticed how your dog hesitates on smooth floors? That’s a sign they need better traction. Test different materials to find what feels secure underfoot but isn’t abrasive to their paws. This small detail can make a huge difference in usability.
Tools You Will Need
- Measuring tape:Accuracy matters for fit and safety.
- Saw:A circular saw or handsaw to cut wood pieces.
- Drill and screws:For sturdy assembly without nails that can loosen.
- Sandpaper:To smooth edges and prevent splinters.
- Clamps:To hold wood steady during cutting and assembling.
- Paintbrush or roller:If you plan to seal or paint the wood.
Having the right tools at hand speeds up the process and results in a safer, neater ramp. Missing even one essential tool can lead to frustrating mistakes or weaker construction.

Credit: www.rufframp.net
Measuring Your Stairs And Space
Measuring your stairs and space correctly is essential for building a safe dog ramp. Accurate measurements ensure the ramp fits perfectly and is comfortable for your dog to use. Take your time and double-check all numbers to avoid mistakes.
Measuring Stair Dimensions
Start by measuring the height of the stairs. Measure from the floor to the top step where the ramp will end. Next, measure the width of the stairs. This helps determine how wide the ramp should be. Also, check the depth of each step. These details affect the ramp’s angle and stability.
Determining Ramp Length And Width
Calculate the ramp length by using the height and the ideal slope for your dog. A gentle slope is safer and easier to climb. Use the formula:
- Ramp Length = Stair Height ÷ Slope Ratio
The recommended slope ratio for dogs is about 1:12. For example, if your stairs are 24 inches high, the ramp should be around 288 inches long. Measure the space around the stairs to confirm the ramp will fit. The ramp width should be at least as wide as the stairs, usually 24 to 30 inches, to allow your dog to walk comfortably.
Designing The Ramp Structure
Designing the ramp structure is a crucial step to ensure your dog can safely and comfortably use the ramp over stairs. The right design balances ease of use with durability, making your pet's daily climb or descent smooth. Let’s break down the key elements to focus on when crafting a ramp that truly works.
Choosing The Ramp Angle
The angle of the ramp determines how easy it is for your dog to walk up and down. Too steep, and your dog might struggle or slip; too shallow, and the ramp becomes unnecessarily long and space-consuming.
Generally, an angle between 18 to 25 degrees works well for most dogs. Older dogs or those with mobility issues benefit from a gentler slope closer to 18 degrees. You can calculate this by measuring the height of the stairs and deciding the length of the ramp.
Ask yourself: Is your dog comfortable climbing stairs now? If not, lean toward a less steep angle. This small adjustment can make a big difference in your pet’s confidence and safety.
Planning Support And Stability
Support and stability keep the ramp safe and reliable. A wobbly ramp can scare your dog and lead to accidents. You need to ensure the structure can hold your dog's weight and stay firmly in place.
Use sturdy materials like treated wood or metal for the frame. Add cross braces underneath the ramp to prevent any bending or sagging. Non-slip pads on the bottom will stop the ramp from sliding on smooth surfaces.
Think about where the ramp will sit—on carpet, tile, or wood flooring—and tailor your support accordingly. Would your dog feel more secure if the ramp had side rails or grips? Adding these can boost confidence during use.

Credit: www.petstep.com
Cutting And Preparing Materials
Cutting and preparing materials is a crucial part of building a dog ramp over stairs. This phase sets the foundation for a sturdy and safe ramp. Taking your time to measure, cut, and smooth the wood will make the assembly process smoother and ensure your dog’s comfort and safety.
Cutting Wood To Size
Start by measuring the length and width needed for the ramp carefully. Use a tape measure to get precise dimensions based on your stairs and your dog’s size. Mark the wood with a pencil before cutting to avoid mistakes.
Use a saw suitable for the type of wood you have—circular saws work well for straight cuts. If you don’t have power tools, a handsaw can do the job but expect to spend more time. Keep your cuts straight and clean to ensure all pieces fit perfectly during assembly.
Sanding And Finishing Edges
After cutting, rough edges and splinters can pose a risk to your dog and yourself. Sand down all cut edges with medium-grit sandpaper first, then finish with fine-grit for a smooth surface. This prevents injuries and gives the ramp a polished look.
Don’t rush this step; smooth edges will make a big difference in the final product’s quality. You might think sanding is tedious, but it’s worth the effort when you see your dog comfortably using the ramp without hesitation.
Assembling The Ramp
Assembling the ramp is where your project truly takes shape. This phase transforms raw materials into a safe, sturdy pathway for your dog. Focus on precision and stability to ensure your ramp supports your pet comfortably and securely.
Building The Frame
The frame is the backbone of your dog ramp. Use strong wood like pine or plywood for durability. Measure the height and width of your stairs carefully to create a frame that fits snugly.
Cut the wood pieces to size, then join them using screws or nails for a solid structure. Adding cross braces between the sides increases stability and prevents wobbling. Double-check the frame’s angles to keep the ramp steady and safe.
Attaching The Ramp Surface
The ramp surface is what your dog will walk on, so it needs to be smooth yet secure. Choose a sturdy plywood sheet that matches the frame’s dimensions. Attach the surface with screws, spacing them evenly to avoid weak spots.
Make sure the surface aligns perfectly with the frame edges to prevent gaps or uneven areas. You might want to sand the edges lightly to remove splinters that could hurt your dog’s paws.
Adding Non-slip Features
Non-slip features are essential to prevent your dog from slipping and getting hurt. You can use adhesive grip tape, outdoor carpet, or rubber mats for traction. Each option has its benefits—grip tape is easy to apply, while carpet adds comfort.
- Test the surface by walking on it yourself to ensure it’s not slippery.
- Secure the non-slip material firmly to avoid shifting over time.
- Consider your dog’s size and paw type when choosing the material.
Would your dog prefer a softer surface or something firmer underfoot? Your choice here can make a big difference in how quickly they adapt to using the ramp.

Credit: www.reddit.com
Installing The Ramp Over Stairs
Installing a dog ramp over stairs requires careful attention to ensure your pet’s safety and comfort. The ramp must be positioned correctly and firmly secured to prevent any accidents. Let’s focus on how to place the ramp safely and keep it stable for your furry friend’s use.
Positioning The Ramp Safely
Start by placing the ramp at a gentle angle to make it easy for your dog to climb. Too steep a ramp can discourage your pet or even cause injury. Measure the height of the stairs and adjust the ramp length to keep the incline gradual.
Check that the ramp covers the entire width of the stairs. This prevents your dog from slipping off the sides during use. You might want to test the ramp yourself by walking up and down it to feel its stability and angle.
Consider your dog’s size and mobility. Smaller dogs or those with joint issues benefit from a longer, less steep ramp. Is your dog hesitant or nervous about using the ramp? Positioning it in a familiar and quiet spot can help ease their anxiety.
Securing The Ramp In Place
Once you find the perfect position, securing the ramp is essential to avoid any movement. Use non-slip pads or rubber mats underneath to keep the base steady on smooth floors. This simple addition can prevent dangerous slips.
Attach the top end of the ramp to the stair landing using brackets or strong hooks. If you have wooden stairs, screws with washers provide a solid hold without damaging the wood. Make sure the attachment doesn’t create sharp edges or gaps.
Don’t forget to double-check the ramp’s stability by gently pushing and shaking it. If it moves, add more support or reposition it. How much time will you spend training your dog to use the ramp safely? A well-secured ramp is the foundation for building your pet’s confidence.
Testing And Adjustments
Testing and making changes to your dog ramp is very important. This step ensures the ramp is safe and comfortable for your dog. You want your dog to enjoy using it without any worries. Small fixes can make a big difference in how well the ramp works.
Checking Stability
Start by placing the ramp on the stairs. Push down gently at different points. Look for any wobbling or shaking. The ramp must stay firm and steady. Use screws or non-slip pads to improve grip. Check that the ramp does not slide on the stairs. A stable ramp keeps your dog safe.
Encouraging Your Dog To Use The Ramp
Introduce the ramp slowly to your dog. Let them sniff and explore it first. Use treats or toys to guide them up the ramp. Praise your dog each time they move forward. Keep sessions short and positive. Be patient; some dogs take time to trust the ramp. Practice daily until your dog feels confident.
Maintenance Tips
Keeping your dog ramp in good shape is key to ensuring your furry friend stays safe and comfortable. Maintenance isn’t just about looks; it’s about spotting problems before they become hazards. A little regular care goes a long way in extending the life of your ramp and keeping it reliable.
Regular Cleaning
Dust, dirt, and pet hair can build up quickly on your ramp, making it slippery or unpleasant for your dog. Clean the surface at least once a week using a mild soap and water solution. Avoid harsh chemicals that might irritate your pet’s paws or damage the ramp’s material.
Focus on the areas where your dog’s nails touch most, as these spots tend to accumulate grime and wear faster. If your ramp has a carpeted surface, vacuum it regularly and consider spot-cleaning stains promptly. Do you notice your dog hesitating to use the ramp? Dirt or slime buildup could be the cause.
Inspecting For Wear And Tear
Check your ramp every few weeks for signs of damage like cracks, loose screws, or worn-out grip surfaces. Even small issues can turn into safety risks if ignored. Tighten any loose bolts and replace parts that look weak or unstable.
Pay special attention to the edges and joints, as these areas often bear the most stress. If you spot splinters or rough patches on a wooden ramp, sand them down to prevent paw injuries. How often do you inspect your ramp? Making it a routine can save you from unexpected repairs later.
Frequently Asked Questions
What Materials Do I Need For A Dog Ramp Over Stairs?
You need plywood or sturdy wood, non-slip surface, screws, brackets, and paint or sealant. These ensure durability and safety for your dog.
How Do I Measure Stairs For A Dog Ramp?
Measure the stair height and length accurately. This ensures the ramp slope is gentle and safe for your dog to climb.
How Steep Should A Dog Ramp Be?
The ramp slope should be between 18 to 25 degrees. This angle is safe and comfortable for most dogs to use.
Can Small Dogs Use A Homemade Ramp Safely?
Yes, as long as the ramp has a non-slip surface and gentle slope. Size-appropriate width also helps small dogs feel secure.
Conclusion
Building a dog ramp over stairs can greatly help your pet. It offers them ease and safety in moving around the home. Using simple tools and materials, you can create a sturdy ramp. Your dog's comfort should guide your design and material choices.
Regular maintenance ensures the ramp remains safe and functional. A well-built ramp can make a big difference in your dog's daily life. It shows love and care for your furry friend. So, start building and watch your pet enjoy newfound freedom.